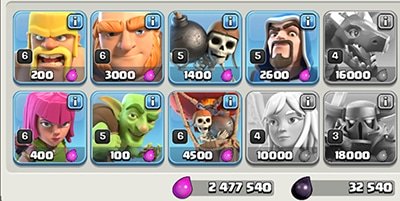
Bienvenue sur Jeux Video Free

World of Tanks: 20 tips to win your battles

World of Tanks is a game of tanks on cards of 15 players against 15. The different categories are defined by so-called third parties. You can play multiple roles as a heavy tank, scout, artillery, sniper, and many other possibilities.

world of tanks
world of tanks

Tips and Tips

  • Play as much as you can, this game requires experience before making dead (except at the beginning of the game) and understand different military strategies
  • Understanding the penetration of shield is important. The optimal angle is 90 degrees. Your angle of fire will be determined by the angle of your enemy’s armor
  • For starters, heavy tanks are a good option
  • Beware of artillery, death can always come from heaven!
  • Do not shoot for nothing, it could make you visible unnecessarily and make your teammates spot
  • Target your shots. It is best to set a target and attack it together. The goal being to take precedence over the number facing the enemy
  • Define your role as part of the team. Depending on tank type, your goal will not be the same
  • Play as a team, communicate as much as possible with your teammates to coordinate attacks, and signify danger zones.
  • Improve your tanks and crews
  • Buy and sell smart
  • Knowing how to stay patient, do not run anywhere without purpose. Stay together while paying attention to artillery
  • Tilt your tank before firing, place your gun over a front wheel
  • Do not stay there! Move immediately after shooting
  • Aim for the weak points of enemy tanks, to get to know them
  • Scout enemy artillery if you can
  • Study maps to avoid trap areas
  • Sell unnecessary parts stocks or tanks
  • Never stand in the way of your enemies’ fire
  • Hide as much as possible, whether behind a house or a rock, stay hidden and take advantage of the view to detect an enemy. Only go out to shoot (taking care to aim well beforehand)
  • Hide when you need to recharge, especially if you put it all for it
  • Do not play alone unless you are a Scout
  • Take your time to adjust your shots
  • Surviving is better than killing at all costs!

Start of game

At first everything usually goes well; you can make dead and buy your first tanks. You can test the few styles of tanks offered at the beginning of games with its different nations. The tanks are quite similar at the beginning of the game

Mid-party

From that moment I would say to third 6, you would start to have tanks that weigh in the balance if they are mounted to the maximum of their abilities. You can discover the joys of country games.

Part confirmed

Here we get into the serious part of the game, towards tier 8. The differences between the nations are felt, the power of the Russian guns and the precision of the German guns are of a whole new level. From then on you will have to help each other and rely on your teammates to win your games. Apply the list of tips above and everything should be fine.

List of recommended tanks

Grille, SU-26, KV1S, IS3, T54, Tiger 2, E100, MAUS,

League of Legends: 10 tips for winning games

League of Legends is a multiplayer arena game where you will lead a champion in a battle arena. Destroy your opponents is become the champion of the arena.

Tips and tricks

  • Test all training positions
  • Test different champion in training or ARAM
  • Train your last hits. Achieving your last hit is especially important to raise your money
  • Master several heroes perfectly so you can change as needed
  • Try to be consistent in your group role
  • Target enemies to shoot down to coordinate your attacks
  • Protect your allies
  • Not dying is often more profitable than killing at all costs
  • Do not isolate yourself in the corner of a map alone
  • Manage your last hit while putting pressure on your opponents
  • Take control of the forests, the dragon, and the boss
  • Manage your mana and think about taking the buffs on the jungle monsters
  • Kill the dragon regularly and the boss if possible

Tips and tricks for ARAM

  • Find a useful position for your team
  • Your stuff must be able to evolve
  • Increase your strengths directly
  • Play safe if you are not used to ARAM
  • Your stuff should allow you to spend time on the battlefield without dying
  • Use the places of care as much as possible
  • Take combinable items
  • Think carefully about your defense

Some ARAM

Morgana
Vayne
Vlad

Fortnite : 10 Tips for winning points in arena

Fortnite is a multiplayer game developed by Epic  Games. The most famous player mode is the royal battle.  Parachuted from a plane, you will have to finish the last survivor  among  the  hundredother  opponents. Different strategies and ways to play will allow you to emerge victorious from your fights. In this game you will have to wield the pickaxe in order to collect materials that will give you the ability to build different planes in order to surprise your enemies. A few tricks will not be too much to get you into the battle arenas.

Tips and tricks

  • Did not put on a parachute or flying too bright so as not to become an aerial target
  • Land on a weapon crate if possible or a weapon directly
  • Destroy the ceiling of a house after landing on a roof
  • Be careful not to fall into the void of more than five floors
  • Do not forget to take building materials when you can
  • Beware of hiding places and straw boots
  • Remember to check the storm zone regularly
  • Avoid cities to start your game (unless you are very good at dueling)
  • Follow the edge of the cyclone zone to be in the top 25 as often as possible
  • Bots can bring you powerful weapons!
  • Entering a phone booth will allow you to hide from the bots
  • Do not hesitate to build walls to protect yourself from snipers if you’re out in the open

Division 1 to 3

In divisions 1 to 3, the level is not much different from that of the normal mode. Avoid combat zones such as big cities and map beginnings. Take your time because you will only be paid from the top 25 solo and from the top 12 in duet. Longer storm zones can pay off to finish in the top 10. The center of the card is generally not recommended for new players. A small island will allow you to hide from you to find weapons as well as some care kits and shields.

Division 4

In Division 4 things are not overly complicated yet. The bus does not cost you much and you can easily reach the top 25 see the top 10 without too much difficulty if you followed the advice so on.

Division 5 and over

The bus costs 20 points or more and you will start to find the top 25 harder to reach. It is not surprising to go down to point at the beginning of Division 5 because the opponents are much more difficult than before.  Serious games can begin!

I advise you to start in isolated islands or sparsely populated areas at the beginning of the game. Collect as many weapons and useful items as possible to prepare for any duels. Keep a low profile and try to wait to reach the top 25. Once the top 25 is reached, the 20 points paid on the bus will be profitable and you can now consider facing other opponents. The top 15 is not easy to reach in Division 5, many good players are already present in this division. If you lose a lot of points, don’t worry, play more carefully and everything should be fine. The 1000 points needed to change Division are not easy to obtain, you will have to be persistent and armed with patience.

Clash of Clans : Complete Guide – Tips and Tricks

Clash of Clans is a strategy game in which you will have to create a village and carry out attacks against other opposing villages. You can be part of a clan and thus wage clan wars.

clash of clans

Tips and tricks

  • Get black elixir using the lightning spell on enemy tanks
  • Cleaning your land can bring you gems
  • Keep mission gems to buy you workers
  • Do not get your city halls up too fast, it will make it easier for you to build your resources
  • From level 7, maximize your villages (walls too)
  • Remember that a level 9 max town hall is harder to destroy than an unmaximised level 10 town hall!
  • Think about improving your clan castle, it is especially useful
  • To mount your trophies, take out some resources and maximize your defenses to trap your opponents
  • To bring down your trophies, go to your village town hall in order to lose battles quickly
  • Save elixir (pink or black) by filling your barracks with unit production
  • Develop your king and queen as soon as you can

Tips and tricks: Clan War

  • Coordinate your attacks, let the small villages start and keep the big ones for the end
  • Do not launch all your attacks right now, keep a few attacks for the end of the war. It’s always helpful to keep a few cards in store
  • Aim for the 3 stars in each of your attacks. It is not profitable to have to pass several times on each village, it is a loss of attacks that will cost you the victory
  • Attack once each and take stock after that, you can then better target your next attacks based on the results of the first wave of attacks
  • Having maximum villages is important to make your opponents’ attacks as difficult as possible
  • Send powerful troops to your allies (the highest levels will have to take care of this)
  • Your alliance will need to have good communication and be active to progress in clan warfare
  • Do not forget to start your attack by destroying the defense troops of the opposing clan castle and beware of the traps
  • Try to take all the stars each time in order to take advantage

Start of game

Improve your attack buildings to collect resources on your opponents. Also expand your personal resources for additional help.

When attacking, choose your opponent’s well based on the resources available and how easy it is to take them. If you want to mount your trophies, attack villages with the town hall outdoors in order to take the trophy points without using a lot of troops. For example, you can win trophies only with a few archers by choosing your targets well. Your opponents will choose to defend either their resources or their trophies. There are a few villages in “hybrid” mode, protecting these two points, but they will generally be weakened in both positions.

Do not rush to set up your town halls.  From level 7, I advise you to maximize your village (the walls also, even if it is a bit long) because during the clan wars, your village could be used for a defense. A well-maxed Level 7 village is more interesting than a Level 8 town hall with low tusks. It will be more expensive and more complicated to take resources on your opponents with a higher city hall and weak attacks.

From level 7

Strengthen all your attacks and defenses to the maximum (the walls too). Build a consistent base based on your needs (protect resources or trophy points or even hybrid).

Improve your dragons as soon as you can, they will be a good strike force in war of clans!

From level 8

History repeats itself a little, maximize your defenses and attacks. You can develop pigs if you feel comfortable with this type oftroop. You can also start attacking with balloons, although they are not very effective at that level. Level 8 does not give, from a point of view, little interest other than to be a transition with level 9 that brings another dimension to the game.

From level 9

Now we are getting to the heart of the matter. You can increase your balloons and raze villages with a large number of resources. Balloons take a lot of creative time but if you launch them at night, you will get a powerful attack every day!

The usual pattern repeats itself, maximizing its attacks, spells and defenses (the walls are exceptionally long to develop but they can change some during the clan war). Ride your heroes to the max with the black elixir (King, Queen…).

At this level of the game, several attack compositions are available. You can choose air attacks (balloons, dragons…), force attacks (PEKKA) or number attacks (witches and wizards). Your castle will also become an important piece of clan warfare defense (depending on the level of your clan).

At that time, you can think about your second village and develop it.

I also advise you to maximize your village before moving your town hall to level 10 because the costs of attacks and the resources available will be more complicated than level 9 and your opponents will have good defenses to counter you.

It is often harder to deal with a well-maxed, built HDV9 than to face a poorly optimized TH10. Clans appreciate having strong defenses rather than villages unable to defend themselves properly. Stars are expensive in clan warfare, maximizing your chances of success by maximizing your villages.

Level 10 and above

There we screw up more, you will have to arm yourself patient at the beginning of level 10 because you will go from leader level 9 to small soldier level 10. But don’t panic, if you’ve followed this guide, you won’t normally have too much trouble moving your village forward quickly and becoming a big, competitive level 10 clan village. You will have the experience to defend yourself and make powerful attacks with a strategy developed by you.

Attack compositions

Dragons
Gowiwi
Balloons
Poison
Gowipe

Some fun video

TH7 vs TH10
Valkyrie vs Wild

To find building plans based on the level of your town hall, visit http://clashofclansbuilder.com/

MMA Manager : Complete Guide – Tips and Tricks – How to win your fights

MMA Manager tips guide

MMA Manager


MMA Manager is a simulation game in which you will have to manage free fight fighters. You will need to develop your gym and your fighters. Buy your equipment and coaching staff to perfect your athletes. Create your own fighters and watch their fights live

In order to allow you to quickly understand the mechanics of the game, this guide will go through the different possibilities offered step by step. You’ll also find tips on how to master different fighting styles and set them up your fighters for your encounters


Gym introduction

Gym introduction


Good to know


  •  You must have the necessary trainers to use equipment
  •  Recruited fighters have training bonuses
  •  The fighters created allow you to be at the maximum weight of your category
  •  Most fighters are boxers
  •  It is difficult for a beginner to defend himself against submissions
  •  Micro-training is very profitable
  •  Multi-star equipment is not required at first
  •  Buy all available first-price coaches (Gym and Combat)
  •  Think about doing the daily quests, they pay well
  •  The Small Thai Gym is small but gives good money and prestige bonuses


Your first gloves

First gym

First gym


Now is the time to start your gym manager business. Take your first fighter and set his combat skill points


Combat skills

Combat skills

Combat skills


In order to become a champion, you will need to improve your fighting skills.

Here is a list of skills you can improve by training your fighters


Punches: Increases your chances of successful punching

Elbows: Increases your chances of getting your elbows

Knees: Increases your chances of successful knee land

Low Kicks: Increases your chances of getting your kicks down

High Kicks: Increases your chances of successfully kicking up

Takedowns: Increases your chances of successful lying your projection

Submission: Increases your chances of successful bid takings

Ground Grappling: Increases your chances of being dominant on the ground

Clinch work: Increases your chances of successful lying your hand-to-hand hits

Strike Def: Increases your chances of successfully defending against punches and elbows

Submission Def: Increases your chances of successfully defending against bid techniques

Takedown Def: Increases your chances of successfully defending against melee techniques

Knees Def: Increases your chances of successful knee-hit defense

Kick Def: Increases your chances of successfully defending against kicks

Conditioning: Increases your fighter’s energy regeneration

Agility: Increases your agility benefits against your opponent

Strength: Increases your health and damage to your attacks


The equipment

Equipement

Equipement


Strength

Strength

Strength


This equipment allows you to train only your strength:


Barbell, Bench press, Cable cross, Cheap barbell, Dumbbell, Leg press


Bags

Bags

Bags


Free Standing Dummy, Kick Bag, Punching Bag, Uppercut Bag


This equipment allows you to train:


Boxing, Punches, High Kicks, Kicks & Knees, Low kicks, Knees, Elbows, Knee Def, Kick Def, Muay Thai, Conditioning, Agility


Misc.

Misc

Misc


Different sofas, Boxing gloves, MMA gloves, Different plants, TV, several decorative items, Truck Wheel, Grappling Dummy


This equipment allows you to train:


Takedowns, Ground Grappling, Submission, BJJ, Clinch work, Takedowns Def, Submission Def


Rings

Rings

Rings


Boxing Ring, MMA Ring, Panel Cage, Wrestling Ring


This equipment allows you to train:


Boxing, Muay Thai, Punches, Elbows, Strike Def, High Kicks, Kicks & Knees, Knees, Low Kicks, Knee Def, Kick Def


Cardio

Cardio

Cardio


This equipment allows you to train only your physical condition:


Battling Rope, Rowing Machine, Stepper, Training Bike, Treadmill


Coaches

Coach

Coach


In order to improve and use your equipment, you will need a trainer to perform the required exercises. You’ll find 2 types of trainers : Gym and Combat

Gym coaches will allow you to work on strength, agility and fitness

The combat coaches will allow you to work on all the fighting techniques

You can only assign one coach to one fighter at a time. The level of the coach must be higher than that of the fighter in order to be able to train him

Coach statistics show you what they train and to what level


The categories of combatants

Categories

Categories


When you choose a fast fight, you have the choice between the category of your fighter and the category open to all fighters

The categories are defined by weight

Some categories are more difficult than others

When you create or recruit a fighter, their weight will define its category. The 3 lightest categories are only accessible by recruiting, you won’t be able to create your fighter with so little weight


The different categories:


Flyweight – Bantamweight – Featherweight – Welterweight – Middleweight – Light Heavyweight- Heavyweight – Super Heavyweight – Open Weight


Types of fights

Types of fight

Types of fight


In the fight menu you will have the choice between different possibilities:


Quick Fight

Quick fight

Quick fight


You can choose to fight in your fighter’s category or choose the category open to everyone. You can also take on your friends.

When you win in your fighter’s categories and the open category, you get trophy points


Campaign

Campaign

Campaign


Face the computer in a series of fights with a boss at the end of each series.

Earn money, credits and prestige points


Tournament

Tournament

Tournament


You can get your fighters involved in tournaments.

The small tournament (level 3), the big tournament (level 6), the grand tournament (level 10)

Earn money, credits and prestige


Gym vs Gym

Gym vs gym

Gym vs gym


Take on an opponent with a team of 7 fighters

The first player to win 4 points has won

Both opponents choose their first fighter and the winner of the fight remains. The loser then chooses his second fighter. So, on until one of the opponents wins 4 points. Gym vs Gym can be forfeited.

When both opponents are at 3 vs 3, they have the option to choose any of the 7 fighters (including battered fighters)


There are three possible strategies:


The first strategy is to choose your strongest or preferred fighter and choose them in this way successively

The second strategy is to choose your strongest or preferred fighter at the beginning and adapt your next fighters according to your opponent (counter fighting styles)

The third strategy is to choose a generalist fighter (who can fight on the ground and above ground with balanced statistics and an adaptive configuration to all situations) and adapt his following fighters according to his opponent


When you want to counter combat styles you have two choices:


Take a fighter with the same fighting style but with superior stats in order to dominate his preferred discipline or then take a completely opposite fighting style

For example, an above-ground fighter could be countered by a ground fight

The first needs to be standing and can be with a lot of distance for kicking and the other will need to be at the cops to melee and ground. The wrestler will stick the Muay Thai fighter will send him to the ground, which will block your opponent’s best attacks

This technique works both ways, making this double-edged system but if you don’t have a fighter powerful enough to win in the same fighting style, it’s a good option

You will have a chance to block the sending of your opponent’s best attacks and place yours

This allows you to beat a better opponent than you if his defense against your technique is not much improved. This may be a double-edged sword but if you don’t have a fighter powerful enough to win in the same fighting style, this is a good option

Set up your fighter

Stats improvement

Stats improvement


By training your fighter, you improve his chances of successful shots. For example, if you train the punch, you’ll hit your punches more often and increase the punch success rate (statistics bars show the success rate)

You will therefore have to define the fighting style and the shots that will be used as well as their frequencies


The configuration choices are:


Approach

Approach

Approach


Very Defensive: Greatly reduces all damage suffered and given but greatly diminishes your initiative also gives a lot of initiative to the opponent

Defensive: Increases defense against punches and projections but reduces your damage and initiative

Balanced: A balanced approach, will not give you any advantage or harm on your damage and your initiative

Offensive: Increases your chances of combos, initiative and damage given but increases your vulnerability to projections and punches

Offensive All-In:  A very aggressive style that greatly damages your damage and initiative but reduce the regeneration of your energy and makes you very vulnerable to projections


Striking Defense


Choose a balance between hit absorption and initiative


At 0 points: Very strong absorption of blows but very low initiative

At 50 points: Absorption and initiative at the medium level

At 100 points: Very low absorption of blows but very strong initiative


Takedown Defense


Choose a balance between defense against projections and initiative


At 0 points: Very strong defense against projections but very weak initiative

At 50 points: Defense against projections and initiative at the medium level

At 100 points: Very weak defense against projections but very strong initiative


Focus Defending


Choose which technique to defend yourself on first


Increases your preparation and concentration on the chosen technique, which reduces the chances of getting hit and decreases some of the damage you’ve suffered from this blow


You can choose between these techniques:


Low Kicks, Knees, Knees, High Kicks, Boxing, Elbows, Balanced, Submission


Set the frequency of the shots used

Frequency of the shots

Frequency of the shots


Set priority for punches, low kicks, knees, elbows and high kicks


The closer your settings are to 0, the less your fighter will use this shot

The closer your settings are to 100, the more your fighter will use this shot


Transition

Transition

Transition


Get off the ground: Escape in the first place to get back off the ground

Neutral: The fighter adapts to the position in which he is in, the standing position is preferred

Takedown: Preference for projection techniques, your fighter will try more to make projections

Takedown All-In: Your fighter will desperately want to make projections. Uses more energy but increases the chances of going to the ground


Clinch


Strategy beneficial to fighters with a lot of strength and skill in close combat

Set the priority of hand-to-hand hits to use


The closer your settings are to 0, the less your fighter will use melee

The closer your settings are to 100, the more your fighter will use melee


Submission


Fight with submissions using keys and choke hold. This strategy is suitable for a strong wrestler with submissive skills


The closer your settings are to 0, the less your fighter will use submission

The closer your settings are to 100, the more your fighter will use submission


Distance


Choose the distance to choose for your fighter


Distance: Beneficial strategy for fighters who need to stand up to send powerful kicks

Normal: A more aggressive style than Distance mode

Ground n Pound: Your fighter will look for opportunities to make projections and ground strikes


Fighting styles

Fighting styles

Fighting styles


Muay Thai: Different standing strikes and melee techniques. Very good for sending knees and elbows

BJJ: Submission, body-taking and ground combat

Wrestling: Hand-to-hand combat, body-to-body combat and projections. Combine with a standing or ground fighting style based on your preferred finishing technique


Talents

Talents

Talents


You can choose talents to activate to improve your fighter

Talent unlocks at level 3, 4, 5, 6, 7 and 10


The closer your settings are to 0, the less your fighter will use this technique

The closer your settings are to 100, the more your fighter will use this technique


Don’t forget to combine Wrestling with Muay Thai or BJJ


Your opponent’s stats

Your opponent's stats

Your opponent’s stats


Reading the statistics to defend yourself is important.

Before you start a fight, you have access to your opponent’s combat statistics


Figures on the left show success rate of hits sent

The numbers on the right show the number of hits sent


Be very careful with this difference, don’t rely on bars first !


Example with image below

Carefull to the stats

Carefull to the stats

View large image


At first glance, our defense should be on the Lows Kicks or the Knees Strikes but this is a big mistake

Our opponent sent 1639 Punches for 446 Lows Kicks and 9 Knees Strikes which clearly means that he plays mainly with his Punches and then 4 times less with his Lows Kicks

However, it has a very good success rate with its Knees Strikes but almost never uses them

His other figures show that he uses almost nothing but his fists and feet, a defense against boxing is a good setup in this situation as the Punch is clearly predominant over other statistics


In terms of his defense, we can see that he is very strong with a small weakness on the knees. A successful opponent in a knee would be a good counter


Facilities

Facilities

Facilities


As you progress, you will be able to buy new gyms. These rooms are unlocked according to your prestige points

The more room you unlock, the newer equipment you unlock

Your equipment and decorations as well as your fights will earn you prestige points

Your room will be able to accommodate members and generate agent and some rooms have prestige bonuses of different levels


You will be able to take a limited number of fighters depending on your room

Tiny Basement – 4, Small Basement – 7, Medium Basement – 10

From Big Basement, you can take up to 15 fighters, which will allow you to increase your trophies and your rank as a manager


The Small Thai room is small but very interesting as it offers a good money bonus and a good prestige bonus, which will make it easier to unlock other rooms afterwards. It costs 500 extra credits, but this is quickly earned through quests, tournaments and campaign

Each room offers pros and cons, so it’s up to you to choose the one that suits you best as you progress


MMA Points

MMA points

MMA points


When you win in quick part, in your fighter’s categories and the open category, you get trophy points

These two types of trophies define your MMA points and therefore your managerial rank


So be sure to check if your fighters have trophies in both categories (open and its weight)

You can see it in your Manager –> High score –> Top fighter –> Top ranks –> Your rank

You will then see the number of trophies in open weight. If you click on a fighter you will see his profile with his number of trophies in open weight. Press the number of trophies to display the trophies in its category


Examples of fighters


In order to better understand the different settings, a few examples of characters created with different fighting styles will allow us to see the differences between the configurations


Bruce Lee

Fighting style: Jeet Kune Do


Bruce Lee approach

Bruce Lee approach


A very offensive approach with a lot of initiative. A lot of defense in Takedown because standing combat and distance are privileged. Defense focused on boxing by default because most fighters are boxers (to be adapted according to the opponent)


Bruce Lee hits

Bruce Lee hits


The choice to put all the shots at 100 is made because this fighter is trained on every shot and his hitting pace needs to be very frequent. A large initiative and a high frequency of hit can strike often and increases the effect of surprise but exposes the defense


Bruce Lee transition

Bruce Lee transition


Above-ground combat has been favored on the ground, so the parameters will be set to fight above ground with as much distance as possible to promote powerful kicks. In completely offensive and remote combat, we aim for the TKO and fast knockout. It’s either going to pass or it’s going to break!


Bruce Lee fighting styles

Bruce Lee fighting styles


Teddy Riner

Fighting style: Judo


Teddy Riner appproach

Teddy Riner approach


A very offensive approach with a lot of initiative.  Lots of defense against strikes to be able to go hand-to-hand and use projections. Standard defense against boxers (to be adapted)


Teddy Riner hits

Teddy Riner hits


The choice to put all the shots to 0 favor the use of ground techniques at the expense of above-ground combat


Teddy Riner transition

Teddy Riner transition


The transition is focused on the Takedown All-In and the distance on Ground n Pound in order to throw his opponent to the ground as quickly as possible. All in submission and no Clinch to promote arm keys and ground strangulation. The Clinch requires to fight above ground, which we are not interested in in this case


Teddy Riner fighting styles

Teddy Riner fighting styles


The BJJ fighting style is preferred in this case to make the best use of ground combat and submissions. Also, a case of a coin toss on the chances of victory


Anderson Da Silva

Fighting style: Muay Thai and Brazilian Jiu-Jitsu


Anderson Da Silva approach

Anderson Da Silva approach


For this fighter a very balanced approach was used. Being a complete fighter, you had to be able to respond to all cases. A balanced approach and 50 defenses do not allow bonuses or penalty but, it allows to be versatile between ground and ground combat


Anderson Da Silva hits

Anderson Da Silva hits


All hit stats are set at 50 to allow a balance between wait and rush


Anderson Da Silva transition

Anderson Da Silva transition


The transition is on neutral and distance over normal in order to have an aggressive style that adapts to the position in which the fighter is located. The Clinch and submission are on 50 to allow to adapt to combat with melee above ground and ground. Interesting Fighter to Start a Gym vs Gym


Anderson Da Silva fighting styles

Anderson Da Silva fighting styles


The fighting styles chosen are The Muay and the BJJ (50% each technique)

Muay Thai allows off-ground techniques and Clinch techniques. The BJJ allows for projection and submission techniques. The alliance of the two allows to fight in all positions with a preference for submission finishes in ground combat

A three-style balance could have been envisaged (33% Muay Thai, 33% BJJ, 33% Wrestling) but we preferred to favor a dominant position of BJJ on the ground (below, unlike the fight) and a submission-type finish (unlike The Ground n Pound which consists of hitting his opponent on a ground, more effective with a dominant position on it)


John Cena

Fighting style: Wrestling


John Cena approach

John Cena approach


For this case we chose to make a wrestler with key stroke finishes.

A very offensive approach with medium defenses to allow to make shots to the body quickly and take blows that could happen by attempting the projections


John Cena hits

John Cena hits


The blows were put mainly on the arms and knees to be able to use the Clinch optimally. Kicking is not the strong point of the wrestlers, we decided not to put them (the Low Kick could have been considered at 50%)


John Cena transition

John Cena transition


The transition was put on Takedown in order to seize the opportunities for ground projection while using the Clinch which requires to be hand-to-hand. Distance Ground n Pound to promote ground projection and ground strikes


John Cena fighting styles

John Cena fighting styles


The fighting styles chosen are Wrestling as a priority and Muay Thai in high school. The Wrestling style favors the use of Clinch, projections and body-taking. The Muay Thai 50 style increases the effectiveness of the Clinch and chooses a ground-kick-type finish, not a submission type like the BJJ (the dominant position will be on in order to hit)


Rocky Balboa

Fighting style: Boxing


Rocky Balboa approach

Rocky Balboa approach


This is the example of the typical boxer. For this case we will prefer fists and all defenses to other styles. We put a very offensive approach to favor the TKO or fast KO with no defense on strikes to promote incentive and responsiveness (a more balanced choice can be interesting too)


Rocky Balboa hits

Rocky Balboa hits


The shots are quickly defined, all about punches to have a pure boxer (a mixture of fists – Low Kicks is often done in the game)


Rocky Balboa transition

Rocky Balboa transition


The transition on Get off the ground is ideal for staying above ground. A boxer is not to his advantage on the ground. The Clinch is the submission are on 0 in order to focus exclusively on boxing (a bit of Clinch could have been possible in order to recover energy but fighting only with fists does not benefit this technique)

The normal distance is applied to have an aggressive style and close enough for punches


Rocky Balboa fighting styles

Rocky Balboa fighting styles


Tony Jaa

Fighting style: Muay Thai


Tony Jaa approach

Tony Jaa approach


This fighter allows you to see the classic Muay Thai. Based on elbows and knees, this technique allows powerful melee strokes as well as from afar. Clinch techniques are very interesting with Muay Thai

A very offensive approach with a defense pushed on the projections, to escape the ground combat as much as possible.


Tony Jaa hits

Tony Jaa hits


The blows are mostly based on the elbows and knees with support the high and low kicks


Tony Jaa transition

Tony Jaa transition


Transition level the Get off the ground is a bon choice, it avoids as much as possible ground combat (neutral can also be chosen to best adapt the Clinch but it increases the risk of ground projection)

The 0 submission and the 50 Clinch allow you to focus on ground-striking combat (without arm keys and strangulations). The normal distance allows an interesting aggressive style for knee and elbow strokes


Tony Jaa fighting styles

Tony Jaa fighting styles


The fighting style for this fighter is the Muay Thai 100%


Chuck Norris

Fighting style: Karate and Taekwondo


Chuck Norris approach

Chuck Norris approach


A very offensive foot-fist style approach has been chosen for the famous Walker Texas Ranger


Chuck Norris hits

Chuck Norris hits


Kicks and punches were favored to promote karate and taekwondo style as well as a high frequency to hit his opponent


Chuck Norris transition

Chuck Norris transition


The Get off the ground transition is chosen to stay above ground and maximum distance in order to kick powerfully to knock TKO or KO

The Clinch and submission are at 0 to promote above-ground combat from a distance


Chuck Norris fighting styles

Chuck Norris fighting styles


Muay Thai style is chosen to allow standing combat


Jerome Le Banner

Fighting Style: Kick Boxing and Muay Thai


Jerome Le banner approach

Jerome Le banner approach


For this great champion of K1 and Pride, a very offensive approach was chosen to allow to affirm the very powerful blows of this fighter

A moderate defense on projections allows you to keep the initiative to try some projections


Jerome Le banner hits

Jerome Le banner hits


All shots have been put to 100 as it uses all off-ground techniques and hits with great frequency


Jerome Le banner transition

Jerome Le banner transition


A neutral transition with a normal distance was promoted to allow close and distant combat. This style allows you to go from a powerful kick from a distance to a knee to a melee without any problems. The Clinch is therefore mounted to 50 because it is useful in this case and the submission to 0 because we want a key finish


Jerome Le banner fighting styles

Jerome Le banner fighting styles


Muay Thai’s fighting style was chosen as a priority to allow for above groundwork and Clinch’s work. Wrestling was set on 50 to strengthen the Clinch but mostly to have projection takes and floor-finishing skills by typing. In the event of a ground fight, he will favor the dominant position on it and hit his opponent (reverse case of the BJJ)


Georges St-Pierre

Fighting style: Karate and Jiu-Jitsu


Georges St-Pierre approach

Georges St-Pierre approach


George St-Pierre is for me the best fighter in MMA (with Da Silva). His complete style and powerful kicks make him an excellent champion

Very offensive approach to allow shots of great power with a lot of initiative and a moderate defense in submission


Georges St-Pierre hits

Georges St-Pierre hits


Being a complete fighter, we still preferred punches and kicks for above-ground combat


Georges St-Pierre transition

Georges St-Pierre transition


Neutral transition and normal distance were chosen to have an effective fighting style over any distance. A little Of Clinch was set to force the opponent to fight in different distances and submit to 50 to support the Brazilian Jiu-Jitsu skills of this fighter (the Clinch with the BJJ allows to perform strangulation and takes at standing melee)


Georges St-Pierre fighting styles

Georges St-Pierre fighting styles


As for the fighting style, the choice was made on Muay Thai and BJJ in the same balance. Muay Thai allows for many off-ground techniques and the BJJ allows for many submissions and projections.

A three-style choice could have been used (33% Muay Thai, 33% BJJ, 33% Wrestling – Everything at 100 comes down to the same result)

But we wanted to favor submission takes with a dominant position below (on the ground) over the fight that offers the Clinch ground strikes in position above


You now have all the keys in hand to develop your gym is creating the future champions of the top 10


Feel free to share your MMA Manager tips and strategies in comments

You can also share your videos related to MMA Manager


F1 Clash : Driver and auto parts stats – Tips and Tricks

Starter car

Starter car

Your vehicle is your main tool because it improves the result of your two drivers

As you progress, you will get maps to improve your car and your drivers

Check out this full list of enhancements to unlock the most useful parts and drivers and save a lot of gold

Feel free to check out our full game guide and tips for becoming the best F1 driver

Stats Saison 2020

The Car

The brakes

Starter brakes 1
Cost Improvement 0
Power 8
Aero 1
Grip 1
Reliability 3
Pit Stop 4,21
Required Cards 0
Gecko 1 2 3 4 5 6 7 8
Cost Improvement 6 800 16 000 32 000 54 000 86 000 128 000 184000
Power 7 7 7 7 7 8 8 8
Aero 3 4 4 4 4 5 5 5
Grip 3 4 7 10 12 15 17 19
Reliability 3 3 4 4 4 5 5 6
Pit Stop 0.67 0.67 0.67 0.67 0.67 0.67 0.67 0.67
Required Cards 4 10 20 50 100 200 400 0
The Keeper 1 2 3 4 5 6 7
Cost Improvement 32 000 54 000 86 000 128 000 184 000 260 000
Power 7 7 7 7 7 8 8
Aero 3 4 4 4 4 5 5
Grip 10 12 14 16 18 20 22
Reliability 12 13 13 13 14 16 17
Pit Stop 0.67 0.67 0.67 0.67 0.67 0.67 0.67
Required Cards 4 10 20 50 100 200 0
Vacuum 1 2 3 4 5 6 7 8 9 10
Cost Improvement 16 000 32 000 54 000 86 000 128 000 260 000 184 k 260 k 340 k 440 k
Power 7 7 7 7 7 8 8 8 8 8
Aero 6 6 7 7 8 8 9 9 10 11
Grip 5 7 10 11 13 15 17 19 22 25
Reliability 3 4 4 4 4 5 5 5 6 6
Pit Stop 0,67 0,67 0,67 0,67 0,67 0,67 0,67 0,67 0,67 0,67
Required Cards 4 10 20 50 100 200 400 1000 2000 0
Drag-on 1 2 3 4 5 6 7
Cost Improvement 86 000 128 000 184 000 260 000 340 000 440 000
Power 7 7 7 7 7 8 8
Aero 9 10 11 13 15 17 18
Grip 6 8 10 11 13 16 18
Reliability 3 4 4 4 4 5 5
Pit Stop 0.67 0.67 0.67 0.67 0.67 0.67 0.67
Required Cards 4 10 20 50 100 200 0
Minimax 1 2 3 4 5 6 7 8
Cost Improvement 86 000 128 000 184 000 260 000 340 000 440 000 560 000
Power 7 7 7 7 7 8 8 8
Aero 8 9 10 10 11 12 12 13
Grip 11 14 17 18 21 24 26 28
Reliability 3 4 4 4 4 5 5 5
Pit Stop 0.67 0.67 0.67 0.67 0.67 0.67 0.67 0.67
Required Cards 4 10 20 50 100 200 400 0
The Feather 1 2 3 4 5 6 7 8 9 10
Cost Improvement 86 k 128 k 184 k 260 k 340 k 440 k 560 k 700 k 860 k
Power 7 7 7 7 7 8 8 8 8 8
Aero 3 4 4 4 4 5 5 5 6 6
Grip 11 14 17 18 21 24 24 26 26 28
Reliability 4 4 5 6 7 7 8 8 9 11
Pit Stop 0.67 0.67 0.67 0.67 0.67 0.67 0.67 0.67 0.67 0.67
Required Cards 4 10 20 50 100 200 400 1000 2000 0
Extreme G 1 2 3 4 5 6 7
Cost Improvement 260 000 340 000 440 000 560 000 700 000 860 000
Power 7 7 7 7 7 8 8
Aero 3 4 4 4 4 5 5
Grip 19 21 24 27 30 32 35
Reliability 3 4 4 4 4 5 5
Pit Stop 0.67 0.67 0.67 0.67 0.67 0.67 0.67
Required Cards 4 10 20 50 100 200 0

Gearbox

Gearbox Starter 1
Cost Improvement 0
Power 4
Aero 1
Grip 1
Reliability 3
Pit Stop 1,05
Required Cards 0
Engager 1 2 3 4 5 6 7 8 9 10
Cost Improvement 2 000 6 800 16 000 32 000 54 000 86 000 128 000 184 000 260 000
Power 7 7 7 7 7 8 8 8 8 8
Aero 3 4 4 4 4 5 5 6 6 6
Grip 3 3 3 4 5 5 6 6 6 7
Reliability 3 3 3 4 5 5 6 6 6 7
Pit Stop 0.67 0.65 0.63 0.59 0.55 0.51 0.47 0.45 0.41 0.34
Required Cards 4 10 20 50 100 200 400 1000 2000 0
Vortex 1 2 3 4 5 6 7
Cost Improvement 32 000 54 000 86 000 128 000 184 000 260 000
Power 7 7 7 7 7 8 8
Aero 6 7 8 8 9 10 11
Grip 3 4 4 4 4 5 5
Reliability 3 4 4 4 4 5 5
Pit Stop 0.49 0.45 0.41 0.37 0.37 0.28 0.24
Required Cards 4 10 20 50 100 200 0
MSM 1 2 3 4 5 6 7
Cost Improvement 54 000 86 000 128 000 184 000 260 000 340 000
Power 7 7 7 7 7 8 8
Aero 3 4 4 4 4 5 5
Grip 3 4 4 4 4 5 5
Reliability 7 8 9 10 11 12 12
Pit Stop 0.67 0.63 0.61 0.59 0.59 0.53 0.49
Required Cards 4 10 20 50 100 200 0
Sliders 1 2 3 4 5 6 7 8 9 10
Cost Improvement 32 k 54 k 86 k 128 k 184 k 260 k 340 k 440 k 560 k
Power 7 7 7 7 7 8 8 8 8 8
Aero 3 4 4 4 4 5 5 5 6 6
Grip 3 4 4 4 4 5 5 5 6 6
Reliability 7 8 9 10 12 13 14 15 16 16
Pit Stop 0.55 0.55 0.55 0.55 0.55 0.55 0.51 0.49 0.47 0.45
Required Cards 4 10 20 50 100 200 400 1000 2000 0
The Gateway 1 2 3 4 5 6 7 8
Cost Improvement 86 000 128 000 184 000 260 000 340 000 440 000 560 000
Power 7 7 7 7 7 8 8 8
Aero 3 4 4 4 4 5 5 5
Grip 5 6 6 7 7 8 9 10
Reliability 3 4 4 4 4 5 5 5
Pit Stop 0.55 0.53 0.49 0.45 0.43 0.39 0.34 0.26
Required Cards 4 10 20 50 100 200 400 0
Smookescreen 1 2 3 4 5 6 7
Cost Improvement 184 000 260 000 340 000 440 000 560 000 700 000
Power 11 12 13 13 13 15 16
Aero 3 4 4 4 4 5 5
Grip 3 4 4 4 4 5 5
Reliability 3 4 4 4 4 5 5
Pit Stop 0.41 0.37 0.32 0.26 0.22 0.18 0.14
Required Cards 4 10 20 50 100 200 0
Humming Bird 1 2 3 4 5 6 7
Cost Improvement 260 000 340 000 440 000 560 000 700 000 860 000
Power 7 7 7 7 7 8 8
Aero 3 4 4 4 4 5 5
Grip 3 4 4 4 4 5 5
Reliability 3 4 4 4 4 5 5
Pit Stop 0.28 0.24 0.20 0.16 0.12 0.08 0.0
Required Cards 4 10 20 50 100 200 0

Rear wing

Rear Wing Starter 1
Cost Improvement 0
Power 18
Aero 1
Grip 1
Reliability 3
Pit Stop 1,05
Required Cards 0
Stealth 1 2 3 4 5 6 7
Cost Improvement 16 000 32 000 54 000 86 000 128 000 184 000
Power 7 7 7 7 7 8 8
Aero 2 2 2 2 3 4 5
Grip 3 4 4 4 4 5 5
Reliability 10 11 12 12 13 13 15
Pit Stop 0,67 0,67 0,67 0,67 0,67 0,67 0,67
Required Cards 4 10 20 50 100 200 0
Phazer 1 2 3 4 5 6 7 8 9 10
Cost Improvement 6 800 16 000 32 000 54 000 86 000 128 000 184 000 260 000 340 000
Power 7 7 7 7 7 8 8 8 8 8
Aero 2 2 4 6 8 10 11 12 13 16
Grip 3 4 5 5 6 7 7 8 8 9
Reliability 3 4 4 4 4 5 5 5 6 6
Pit Stop 0,67 0,67 0,67 0,67 0,67 0,67 0,67 0,67 0,67 0,67
Required Cards 4 10 20 50 100 200 400 1000 2000 0
Contrail 1 2 3 4 5 6 7 8
Cost Improvement 32 000 54 000 86 000 128 000 184 000 260 000 340 000
Power 9 9 10 10 10 10 10 10
Aero 5 6 8 10 11 13 15 16
Grip 3 4 4 4 4 5 5 5
Reliability 3 4 4 4 4 5 5 5
Pit Stop 0,67 0,67 0,67 0,67 0,67 0,67 0,67 0,67
Required Cards 4 10 20 50 100 200 400 0
Peregrine 1 2 3 4 5 6 7
Cost Improvement 86 000 128 000 184 000 260 000 340 000 440 000
Power 13 14 15 16 16 17 18
Aero 2 2 3 4 5 6 7
Grip 3 4 4 4 4 5 5
Reliability 3 4 4 4 4 5 5
Pit Stop 0,67 0,67 0,67 0,67 0,67 0,67 0,67
Required Cards 4 10 20 50 100 200 0
Lock & Load 1 2 3 4 5 6 7 8
Cost Improvement 86 000 128 000 184 000 260 000 340 000 440 000 560 000
Power 7 7 7 7 7 8 8 8
Aero 6 8 10 12 14 15 16 18
Grip 3 4 4 4 4 5 5 5
Reliability 3 4 4 4 4 5 5 5
Pit Stop 0.53 0.53 0.51 0.51 0.49 0.47 0.47 0.45
Required Cards 4 10 20 50 100 200 400 0
BASE 1 2 3 4 5 6 7 8 9 10
Cost Improvement 86 000 128 000 184 000 260 000 340 000 440 000 560 000 700 000 860 000
Power 9 10 10 10 10 10 10 12 12 13
Aero 6 7 8 9 10 12 14 15 17 18
Grip 3 4 4 4 4 5 5 5 6 6
Reliability 3 4 4 4 4 5 5 5 6 6
Pit Stop 0,67 0,67 0,67 0,67 0,67 0,67 0,67 0,67 0,67 0,67
Required Cards 4 10 20 50 100 200 400 1000 2000 0
Type A 1 2 3 4 5 6 7
Cost Improvement 260 000 340 000 440 000 560 000 700 000 860 000
Power 7 7 7 7 7 8 8
Aero 16 17 19 21 24 27 29
Grip 3 4 4 4 4 5 5
Reliability 3 4 4 4 4 5 5
Pit Stop 0,67 0,67 0,67 0,67 0,67 0,67 0,67
Required Cards 4 10 20 50 100 200 0

Front wing

Front Wing Starter 1
Cost Improvement 0
Power 13
Aero 1
Grip 1
Reliability 3
Pit Stop 1,05
Required Cards 0
The Carver 1 2 3 4 5 6 7
Cost Improvement 16 000 32 000 54 000 86 000 128 000 184 000
Power 7 7 7 7 7 8 8
Aero 3 4 4 4 4 5 5
Grip 3 3 3 4 5 6 7
Reliability 10 11 12 13 12 14 15
Pit Stop 0,67 0,67 0,67 0,67 0,67 0,67 0,67
Required Cards 4 10 20 50 100 200 0
Lock-on 1 2 3 4 5 6 7 8 9 10
Cost Improvement 6 800 16 000 32 000 54 000 86 000 128 000 184 000 260 000 340 000
Power 7 7 7 7 7 8 8 8 8 8
Aero 3 4 4 4 4 5 5 5 6 6
Grip 2 3 3 3 4 4 5 5 6 6
Reliability 3 4 4 4 4 5 5 5 6 6
Pit Stop 0.65 0.63 0.59 0.53 0.47 0.47 0.45 0.41 0.39 0,34
Required Cards 4 10 20 50 100 200 400 1000 2000 0
Big Bite 1 2 3 4 5 6 7 8
Cost Improvement 32 000 54 000 86 000 128 000 184 000 260 000 340 000
Power 9 10 11 10 13 15 16 17
Aero 3 4 4 4 4 5 5 5
Grip 3 4 4 4 4 5 5 5
Reliability 4 4 4 4 5 5 6 7
Pit Stop 0,67 0,67 0,67 0,67 0,67 0,67 0,67 0,67
Required Cards 4 10 20 50 100 200 400 0
Blazer 1 2 3 4 5 6 7 8 9 10
Cost Improvement 32 k 54 k 86 k 128 k 184 k 260 k 340 k 440 k 560 k
Power 7 7 7 7 7 8 8 8 8 8
Aero 2 2 3 5 6 8 10 11 13 14
Grip 3 4 4 4 4 5 5 5 6 6
Reliability 3 3 3 4 4 5 5 6 6 7
Pit Stop 0,67 0,67 0,67 0,67 0,67 0,67 0,67 0,67 0,67 0,67
Required Cards 4 10 20 50 100 200 400 1000 2000 0
Pogo 1 2 3 4 5 6 7
Cost Improvement 128 000 184 000 260 000 340 000 440 000 560 000
Power 7 7 7 7 7 8 8
Aero 3 4 4 4 4 5 5
Grip 11 12 13 14 15 16 16
Reliability 3 4 4 4 4 5 5
Pit Stop 0.63 0.61 0.59 0.55 0.53 0.51 0.49
Required Cards 4 10 20 50 100 200 0
Bullet 1 2 3 4 5 6 7 8
Cost Improvement 128 000 184 000 260 000 340 000 440 000 560 000 700 000
Power 11 12 13 13 15 16 17 19
Aero 3 4 4 4 4 5 5 5
Grip 5 5 6 6 7 7 8 8
Reliability 3 4 4 4 4 5 5 5
Pit Stop 0,67 0,67 0,67 0,67 0,67 0,67 0,67 0,67
Required Cards 4 10 20 50 100 200 400 0
FX 1 2 3 4 5 6 7
Cost Improvement 260 000 340 000 440 000 560 000 700 000 860 000
Power 7 7 7 7 7 8 8
Aero 3 4 4 4 4 5 5
Grip 15 17 19 21 24 25 27
Reliability 3 4 4 4 4 5 5
Pit Stop 0,67 0,67 0,67 0,67 0,67 0,67 0,67
Required Cards 4 10 20 50 100 200 0

Suspension

Suspension Starter 1
Cost Improvement 0
Power 4
Aero 1
Grip 1
Reliability 3
Pit Stop 1,05
Required Cards 0
Bungee 1 2 3 4 5 6 7
Cost Improvement 16 000 32 000 54 000 86 000 128 000 184 000
Power 7 7 7 7 7 8 8
Aero 3 4 4 4 4 5 5
Grip 3 4 4 4 4 5 5
Reliability 3 4 4 5 6 7 7
Pit Stop 0.43 0.41 0.39 0.37 0.34 0.32 0.28
Required Cards 4 10 20 50 100 200 0
Compressor 1 2 3 4 5 6 7 8 9 10
Cost Improvement 6 800 16 000 32 000 54 000 86 000 128 000 184 000 260 000 340 000
Power 7 7 7 7 7 8 8 8 8 8
Aero 6 7 8 9 10 10 11 12 12 13
Grip 3 4 4 4 4 5 5 5 6 6
Reliability 3 4 6 7 9 9 12 12 13 15
Pit Stop 0,67 0,67 0,67 0,67 0,67 0,67 0,67 0,67 0,67 0,67
Required Cards 4 10 20 50 100 200 400 1000 2000 0
The Influencer 1 2 3 4 5 6 7 8
Cost Improvement 32 000 54 000 86 000 128 000 184 000 260 000 340 000
Power 7 7 7 7 7 8 8 8
Aero 6 7 7 8 9 9 10 11
Grip 3 4 4 4 4 5 5 5
Reliability 4 5 7 8 9 10 12 13
Pit Stop 0,67 0,67 0,67 0,67 0,67 0,67 0,67 0,67
Required Cards 4 10 20 50 100 200 400 0
Limbo 1 2 3 4 5 6 7
Cost Improvement 86 000 128 000 184 000 260 000 340 000 440 000
Power 7 7 7 7 7 8 8
Aero 14 15 16 18 20 20 22
Grip 3 4 4 4 4 5 5
Reliability 2 2 3 4 4 5 6
Pit Stop 0,67 0,67 0,67 0,67 0,67 0,67 0,67
Required Cards 4 10 20 50 100 200 0
Pinpoint 1 2 3 4 5 6 7 8 9 10
Cost Improvement 54 k 86 k 128k 184 k 260 k 340 k 440 k 560 k 700 k
Power 7 7 7 7 7 8 8 8 8 8
Aero 3 4 4 4 4 5 5 5 6 6
Grip 3 4 4 4 4 5 5 5 6 6
Reliability 3 3 4 5 7 8 8 11 12 12
Pit Stop 0.65 0.65 0.63 0.61 0.59 0.59 0.55 0.55 0.53 0.53
Required Cards 4 10 20 50 100 200 400 1000 2000 0
Mantis 1 2 3 4 5 6 7 8
Cost Improvement 128 000 184 000 260 000 340 000 440 000 560 000 700 000
Power 7 7 7 7 7 8 8 8
Aero 3 4 4 4 4 5 5 5
Grip 3 4 4 4 4 5 5 5
Reliability 5 7 8 10 12 13 13 15
Pit Stop 0.59 0.59 0.55 0.55 0.53 0.53 0.51 0.49
Required Cards 4 10 20 50 100 200 400 0
Girder 1 2 3 4 5 6 7
Cost Improvement 260 000 340 000 440 000 560 000 700 000 860 000
Power 7 7 7 7 7 8 8
Aero 3 4 4 4 4 5 5
Grip 3 4 4 4 4 5 5
Reliability 15 17 20 21 22 25 26
Pit Stop 0,67 0,67 0,67 0,67 0,67 0,67 0,67
Required Cards 4 10 20 50 100 200 0

Engine

Engine Starter 1
Cost Improvement 0
Power 21
Aero 1
Grip 1
Reliability 3
Pit Stop 1,05
Required Cards 0
The Stickler 1 2 3 4 5 6 7 8 9 10
Cost Improvement 2 000 6 800 16 000 32 000 54 000 86 000 128 000 184 000 260 000
Power 8 11 12 13 15 17 17 19 21 23
Aero 3 4 4 4 4 5 5 5 6 6
Grip 3 3 3 3 4 4 5 5 6 6
Reliability 3 4 4 4 4 5 5 5 6 6
Pit Stop 0.67 0.67 0.67 0.67 0.67 0.67 0.67 0.67 0.67 0.67
Required Cards 4 10 20 50 100 200 400 1000 2000 0
Gorilla 1 2 3 4 5 6 7 8
Cost Improvement 16 000 32 000 54 000 86 000 128 000 184 000 260 000
Power 13 16 17 17 19 21 22 25
Aero 3 4 4 4 4 5 5 5
Grip 5 5 6 6 7 7 8 8
Reliability 3 4 4 4 4 5 5 5
Pit Stop 0.67 0.67 0.67 0.67 0.67 0.67 0.67 0.67
Required Cards 4 10 20 50 100 200 400 0
Blinker 1 2 3 4 5 6 7
Cost Improvement 54 000 86 000 128 000 184 000 260 000 340 000
Power 8 11 11 12 12 17 17
Aero 3 4 4 4 4 5 5
Grip 3 4 4 4 4 5 5
Reliability 3 4 4 4 4 5 5
Pit Stop 0.47 0.45 0.43 0.41 0.39 0.37 0.34
Required Cards 4 10 20 50 100 200 0
The Brute 1 2 3 4 5 6 7 8 9 10
Cost Improvement 32 k 54 k 86 k 128 k 184 k 260 k 340 k 440 k 560 k
Power 8 10 11 11 12 14 16 17 17 17
Aero 3 4 4 4 4 5 5 5 6 6
Grip 6 6 7 8 9 10 11 11 12 13
Reliability 3 4 4 4 4 5 5 5 6 6
Pit Stop 0.67 0.67 0.67 0.67 0.67 0.67 0.67 0.67 0.67 0.67
Required Cards 4 10 20 50 100 200 400 1000 2000 0
Big Bore 1 2 3 4 5 6 7 8
Cost Improvement 184 000 260 000 340 000 440 000 560 000 700 000 860 000
Power 16 17 19 21 24 25 28 29
Aero 3 4 4 4 4 5 5 5
Grip 3 4 4 4 4 5 5 5
Reliability 3 4 4 4 4 5 5 5
Pit Stop 0.67 0.67 0.67 0.67 0.67 0.67 0.67 0.67
Required Cards 4 10 20 50 100 200 400 0
Smooth Operator 1 2 3 4 5 6 7
Cost Improvement 184 000 260 000 340 000 440 000 560 000 70 000
Power 16 17 20 21 24 25 28
Aero 3 4 4 4 4 5 5
Grip 3 4 4 4 4 5 5
Reliability 7 7 8 8 9 10 11
Pit Stop 0.67 0.67 0.67 0.67 0.67 0.67 0.67
Required Cards 4 10 20 50 100 200 0
Passion 1 2 3 4 5 6 7
Cost Improvement 184 000 260 000 340 000 440 000 560 000 700 000
Power 22 25 26 28 29 32 33
Aero 3 4 4 4 4 5 5
Grip 3 4 4 4 4 5 5
Reliability 3 4 4 4 4 5 5
Pit Stop 0,67 0,67 0,67 0,67 0,67 0,67 0,67
Required Cards 4 10 20 50 100 200 0

The Pilots

Lance Stroll 1 2 3 4 5 6 7 8 9 10
Cost Improvement 86 000 128 000 184 000 260 000 340 000 440 000 560 000 700 000 860 000
Overtaking 17 19 22 24 27 30 32 35 39 42
Defense 22 25 28 30 33 36 39 42 46 49
Regularity 13 15 17 19 22 25 27 29 33 36
Fuel

Economy

29 32 35 38 41 44 47 50 54 57
Tire Management 38 41 44 47 50 53 56 59 63 66
Rain Performance 49 52 55 58 61 64 67 70 73 76
Required Cards 4 10 20 50 100 200 400 1000 2000 0
Alexander Albon 1 2 3 4 5 6 7 8
Cost Improvement 440 000 560 000 700 000 860 000 1,040 M 1,1240 M 1,460 M
Overtaking 48 52 56 60 65 69 74 79
Defense 20 24 27 30 35 40 46 52
Regularity 25 29 32 36 41 46 52 58
Fuel

Economy

59 63 67 71 75 79 83 87
Tire Management 31 35 39 43 48 53 59 64
Rain Performance 39 43 47 51 56 60 66 71
Required Cards 4 10 20 50 100 200 400 0
Nico Hulkenberg 1 2 3 4 5 6 7
Cost Improvement 2 000 6 800 16 000 32 000 54 000 86 000
Overtaking 40 40 58 64 64 64 85
Defense 60 66 66 72 91 91 98
Regularity 12 12 12 24 50 50 82
Fuel

Economy

0 12 12 12 12 12 28
Tire Management 40 40 58 70 83 100 100
Rain Performance 20 29 29 61 61 83 83
Required Cards 4 10 20 50 100 200 0
Antonio Giovinazzi 1 2 3 4 5 6 7 8 9 10
Cost Improvement 2 000 6800 16 000 32 000 54 000 86 000 128 000 184 000 260 000
Overtaking 9 10 11 13 15 17 19 22 25 27
Defense 12 14 15 17 19 22 24 27 30 32
Regularity 40 43 46 49 52 55 58 61 64 67
Fuel

Economy

30 33 35 38 41 44 47 50 53 56
Tire Management 16 19 20 22 25 28 30 33 36 39
Rain Performance 22 25 27 29 32 35 38 41 44 47
Cartes requises 4 10 20 50 100 200 400 1000 2000 0
Latifi 1 2 3 4 5 6 7 8 9 10
Cost Improvement 2 000 6800 16 000 32 000 54 000 86 000 128 000 184 000 260 000
Overtaking 20 22 25 27 29 32 35 38 41 44
Defense 37 40 43 46 49 52 55 58 61 64
Regularity 11 12 14 15 17 19 22 24 27 30
Fuel

Economy

15 16 19 20 22 25 28 30 33 36
Tire Management 27 30 33 35 38 41 44 41 50 53
Rain Performance 8 9 10 11 13 15 17 19 22 25
Cartes requises 4 10 20 50 100 200 400 1000 2000 0
Ocon 1 2 3 4 5 6 7 8 9 10
Cost Improvement 6800 16 000 32 000 54 000 86 000 128 000 184 000 260 000 340 000
Overtaking 10 11 13 15 17 19 22 25 27 29
Defense 14 15 17 19 22 24 27 30 32 35
Regularity 33 35 38 41 44 47 50 53 56 59
Fuel

Economy

25 27 29 32 35 38 41 44 47 50
Tire Management 19 20 22 25 28 30 33 36 39 42
Rain Performance 43 46 49 52 55 58 61 64 67 70
Cartes requises 4 10 20 50 100 200 400 1000 2000 0
Max Verstappen 1 2 3 4 5 6 7
Cost Improvement 44 000 560 000 700 000 860 000 1,040 M 1,240 M
Overtaking 65 70 75 80 85 90 95
Defense 37 42 48 53 61 68 76
Regularity 25 29 35 40 48 56 66
Fuel

Economy

54 59 65 70 76 82 88
Tire Management 30 35 41 46 54 62 71
Rain Performance 45 50 56 61 68 75 82
Required Cards 4 10 20 50 100 200 0
Daniil Kvyat 1 2 3 4 5 6 7 8
Cost Improvement 32 000 54 000 86 000 128 000 184 000 260 000 340 000
Overtaking 28 31 35 39 43 47 51 56
Defense 36 40 44 48 52 56 60 60
Regularity 16 19 22 25 29 32 36 41
Fuel

Economy

47 51 55 59 63 67 71 75
Tire Management 12 15 17 20 24 27 30 35
21 21 24 28 31 35 39 43 48
Required Cards 4 10 20 50 100 200 400 0
Gasly 1 2 3 4 5 6 7 8
Cost Improvement 32 000 54 000 86 000 128 000 184 000 260 000 340 000 440 000
Overtaking 46 49 52 55 58 61 64 67
Defense 11 13 15 17 19 22 25 27
Regularity 20 22 25 28 30 33 36 39
Fuel

Economy

27 29 32 35 38 41 44 47
Tire Management 15 17 19 22 24 27 30 32
Rain Performance 35 38 41 44 47 50 53 56
Cartes requises 4 10 20 50 100 200 400 1000
Daniel Ricciardo 1 2 3 4 5 6 7
Cost Improvement 6800 16 000 32 000 54 000 86 000 128 0000
Overtaking 35 39 44 49 54 59 65
Defense 12 14 17 21 25 29 35
Regularity 45 50 55 60 65 70 75
Fuel

Economy

16 18 22 26 30 35 41
Tire Management 21 23 28 32 37 42 48
Rain Performance 27 30 35 40 45 50 56
Required Cards 4 10 20 50 100 200 0
Lando Norris 1 2 3 4 5 6 7 8
Cost Improvement 86 000 128 000 184 000 260 000 340 000 440 000 560 000
Overtaking 51 55 59 63 67 71 75 79
Defense 31 35 39 43 47 51 56 60
Regularity 40 44 48 52 56 60 65 69
Fuel

Economy

19 22 25 29 32 36 41 46
Tire Management 15 17 20 24 27 30 35 40
Rain Performance 24 28 31 35 39 43 48 53
Required Cards 4 10 20 50 100 200 400 0
Carlos Sainz 1 2 3 4 5 6 7
Cost Improvement 2 000 6 800 16 000 32 000 54 000 86 000
Overtaking 16 21 23 28 32 37 42
Defense 30 35 39 44 49 54 59
Regularity 40 45 50 55 60 65 70
Fuel

Economy

9 12 14 17 21 25 29
Tire Management 22 27 30 35 40 45 50
Rain Performance 12 16 18 22 26 30 35
Required Cards 4 10 20 50 100 200 0
Valtteri Bottas 1 2 3 4 5 6 7
Cost Improvement 86 000 128 000 184 000 260 000 340 000 440 000
Overtaking 28 32 37 42 48 53 61
Defense 35 40 45 50 56 61 68
Regularity 44 49 54 59 65 70 76
Fuel

Economy

55 60 65 70 75 80 85
Tire Management 22 26 30 35 41 46 54
Rain Performance 17 21 25 29 35 40 48
Required Cards 4 10 20 50 100 200 0
George Russell 1 2 3 4 5 6 7 8
Cost Improvement 6800 16 000 32 000 54 000 86 000 128 000 184 000
Overtaking 10 12 15 17 20 24 27 30
Defense 14 16 19 22 25 29 32 36
Regularity 25 28 31 35 39 43 47 51
Fuel

Economy

19 21 24 28 31 35 39 43
Tire Management 43 47 51 55 59 63 67 71
Rain Performance 33 36 40 44 48 52 56 60
Required Cards 4 10 20 50 100 200 400 0
Charles Leclerc 1 2 3 4 5 6 7
Cost Improvement 32 000 54 000 86 000 128 000 184 000 260 000 340 000
Overtaking 50 55 60 65 70 75 80
Defense 30 35 40 45 50 56 61
Regularity 18 22 26 30 35 41 46
23 28 32 37 42 48 53 55
Tire Management 39 44 49 54 59 65 70
Rain Performance 14 17 21 25 29 35 40
Required Cards 4 10 20 50 100 200
Raikkonen 1 2 3 4 5 6 7 8
Cost Improvement 440 k 560 k 700 k 860 k 1,040 M 1,240 M 1,460 M
Overtaking 43 47 51 56 60 66 71 77
Defense 63 67 71 75 79 83 87 91
Regularity 52 56 60 65 69 74 79 84
Fuel

Economy

24 27 30 35 40 46 52 60
Tire Management 35 39 43 48 53 59 64 71
Rain Performance 29 32 36 41 46 52 58 65
Cartes requises 4 10 20 50 100 200 400
Romain Grosjean 1 2 3 4 5 6 7 8 9 10
Cost Improvement 440 k 560 k 700 k 860 k 1,040 M 1,240 M 1,460 M 1,720 M 2,150 M
Overtaking 44 47 50 53 56 59 63 66 70 73
Defense 28 30 33 36 39 42 46 49 54 58
Regularity 17 19 22 25 27 29 33 36 41 46
Fuel

Economy

35 38 41 44 47 50 54 57 62 65
Tire Management 55 58 61 64 67 70 73 76 79 82
Rain Performance 22 24 27 30 32 35 39 42 47 52
Required Cards 4 10 20 50 100 200 400 1000 2000 0
Sergio Perez 1 2 3 4 5 6 7 8
Cost Improvement 2 000 440 000 560 000 700 000 860 000 1 040 000 1 240 000 1 460 000
Overtaking 22 25 29 32 36 41 46 52
Defense 17 20 24 27 30 35 40 46
Regularity 55 59 63 67 71 75 79 83
Fuel

Economy

35 39 43 47 51 56 60 66
Tire Management 28 31 35 39 43 48 53 59
Rain Performance 44 48 52 56 60 65 95 95
Required Cards 4 10 20 50 100 200 400 0
Sebastian Vettel 1 2 3 4 5 6 7
Cost Improvement 184 000 260 000 340 000 440 000 560 000 700 000
Overtaking 40 45 50 56 61 68 75
Defense 49 54 59 65 70 76 82
Regularity 26 30 35 41 46 54 62
Fuel

Economy

21 25 29 35 40 48 56
Tire Management 60 65 70 75 80 85 90
Rain Performance 32 37 42 48 53 61 68
Required Cards 4 10 20 50 100 200 0
Magnussen 1 2 3 4 5 6 7 8 9 10
Cost Improvement 184 k 260 k 340 k 440 k 560 k 700 k 860 k 1,040 M 1,1240 M
Overtaking 32 35 38 41 44 47 50 54 57 62
Defense 52 55 58 61 64 67 70 73 76 79
Regularity 15 17 19 22 25 27 29 33 36 41
Fuel

Economy

41 44 47 50 53 56 59 63 66 70
Tire Management 19 22 24 27 30 32 35 39 42 47
Rain Performance 25 28 30 33 36 39 42 46 49 54
Cartes requises 4 10 20 50 100 200 400 1000 2000 0
Lewis Hamilton 1 2 3 4 5 6 7
Cost Improvement 440 000 560 000 700 000 860 000 1,1040 M 1,240 M
Overtaking 59 65 70 76 82 88 95
Defense 42 48 53 61 68 76 85
Regularity 50 56 61 68 75 82 90
Fuel

Economy

35 41 46 54 62 71 80
Tire Management 29 35 40 48 56 66 76
Rain Performance 70 75 80 85 90 95 100
Required Cards 4 10 20 50 100 200 0

Stats Saison 2019

The Car

The breaks

The breaks

The breaks

In the category of brakes there are two brakes used most often

Soft Touch at the start of your career and thereafter The Chute

Starter brakes 1
Cost Improvement 0
Power 8
Aero 1
Grip 1
Reliability 3
Pit Stop 4,21
Required Cards 0
The Anchor 1 2 3 4 5 6 7 8
Cost Improvement 2 000 6 800 16 000 32 000 54 000 86 000 128 000
Power 9 9 9 10 10 10 10 10
Aero 1 1 2 2 4 4 5 5
Grip 4 6 6 6 7 7 11 13
Reliability 3 3 3 3 4 4 5 5
Pit Stop 1,15 1,05 1,05 1,02 1,02 1,01 1,01 0,93
Required Cards 4 10 20 50 100 200 400 0
Heavy Duty 1 2 3 4 5 6 7
Cost Improvement 6 800 16 000 32 000 54 000 86 000 128 000
Power 8 8 8 8 8 8 9
Aero 9 10 12 13 13 13 13
Grip 0 0 0 0 4 4 4
Reliability 6 6 6 7 7 8 8
Pit Stop 1,01 0,97 0,96 0,75 0,67 0,52 0,37
Required Cards 4 10 20 50 100 200 0
Soft Touch 1 2 3 4 5 6 7 8 9 10
Cost Improvement 32 000 54 000 86 000 128 000 184 000 260 000 340 000 440 000 560 000
Power 11 11 11 12 12 12 13 13 13 13
Aero 7 10 10 11 11 12 12 12 12 13
Grip 1 1 1 1 3 3 3 3 5 5
Reliability 3 3 4 4 4 5 6 6 10 10
Pit Stop 1,15 1,15 1,15 0,99 0,93 0,93 0,93 0,82 0,82 0,63
Required Cards 4 10 20 50 100 200 400 1000 2000 0
Slam Stop 1 2 3 4 5 6 7 8
Cost Improvement 86 000 128 000 184 000 260 000 340 000 440 000 560 000
Power 9 9 9 10 10 10 10 10
Aero 4 6 6 6 7 7 8 8
Grip 1 1 1 1 1 5 5 7
Reliability 11 11 12 12 14 14 14 14
Pit Stop 1,01 0,96 0,86 0,86 0,78 0,78 0,63 0,45
Required Cards 4 10 20 50 100 200 400 0
WTWT 1 2 3 4 5 6 7 8
Cost Improvement 184 000 260 000 340 000 440 000 560 000 700 000 860 000
Power 9 9 9 9 10 10 10 10
Aero 11 11 13 13 13 14 14 14
Grip 3 5 5 5 6 10 10 10
Reliability 3 3 3 4 4 4 5 7
Pit Stop 1,01 0,99 0,96 0,82 0,82 0,82 0,63 0,48
Required Cards 4 10 20 50 100 200 400 0
The Chute 1 2 3 4 5 6 7 8 9 10
Cost Improvement 440 000 560 000 700 000 860 000 1, 04 M 1, 24 M 1, 46 M 1, 72 M 2 M
Power 12 12 13 13 13 13 14 14 14 14
Aero 10 11 11 11 14 14 14 14 14 14
Grip 1 2 2 3 3 4 4 6 6 8
Reliability 3 3 3 4 4 7 7 7 10 14
Pit Stop 1,15 1,02 1,02 1,01 1,01 0,96 0,86 0,86 0,82 0,82
Required Cards 4 10 20 50 100 200 400 1000 2000 0
Calipso 1 2 3 4 5 6 7
Cost Improvement 184 000 260 000 340 000 440 000 560 000 700 000
Power 14 14 14 14 14 15 15
Aero 6 6 8 8 8 11 11
Grip 6 6 8 8 11 11 13
Reliability 6 9 9 9 10 11 11
Pit Stop 1,01 0,9 0,9 0,67 0,67 0,67 0,45
Required Cards 4 10 20 50 100 200 0

Gearbox

Gearbox

Gearbox

In terms of the gearbox, The Shredder and Sync Star are great choices

King Cog can be an alternative as well

Starter

Gearbox

1
Cost Improvement 0
Power 4
Aero 1
Grip 1
Reliability 3
Pit Stop 1,05
Required Cards 0
The Revolution 1 2 3 4 5 6 7 8 9 10
Cost Improvement 2 000 6 800 16 000 32 000 54 000 86 000 128 000 184 000 260 000
Power 4 4 4 4 4 4 4 5 5 5
Aero 2 3 3 4 4 6 6 7 9 9
Grip 0 0 0 0 0 1 2 2 3 3
Reliability 3 3 3 3 4 4 5 5 5 7
Pit Stop 1,15 1,15 1,02 0,97 0,97 0,9 0,9 0,9 0,9 0,78
Required Cards 4 10 20 50 100 200 400 1000 2000 0
TorQ 1 2 3 4 5 6 7
Cost Improvement 6 800 16 000 32 000 54 000 86 000 128 000
Power 4 4 4 4 4 4 4
Aero 4 4 6 6 6 6 9
Grip 10 10 10 12 14 14 14
Reliability 2 4 4 4 5 6 7
Pit Stop 0,82 0,67 0,6 0,48 0,48 0,48 0,33
Required Cards 4 10 20 50 100 200 0
The Holeshot 1 2 3 4 5 6 7
Cost Improvement 32 000 54 000 86 000 128 000 184 000 260 000
Power 4 5 5 5 5 5 5
Aero 0 0 1 1 4 4 6
Grip 1 1 1 4 4 5 5
Reliability 11 11 14 14 14 14 14
Pit Stop 1,15 1,02 1,01 0,99 0,99 0,78 0,67
Required Cards 4 10 20 50 100 200 0
The Shredder 1 2 3 4 5 6 7 8
Cost Improvement 86 000 128 000 184 000 260 000 340 000 440 000 560 000
Power 5 5 5 5 5 5 5 5
Aero 11 11 13 13 14 14 14 14
Grip 0 2 2 6 8 9 13 14
Reliability 3 3 4 4 5 5 7 9
Pit Stop 1,15 1,15 1,15 1,15 1,15 1,15 1,15 1,15
Required Cards 4 10 20 50 100 200 400 0
King Cog 1 2 3 4 5 6 7 8 9 10
Cost Improvement 184 000 260 000 340 000 440 000 560 000 700 000 860 000 1, 04 M 1, 24 M
Power 4 4 4 4 4 4 4 5 5 5
Aero 4 4 4 6 6 7 7 8 8 10
Grip 4 4 4 5 5 6 6 6 9 9
Reliability 6 7 8 8 10 10 11 11 12 12
Pit Stop 1,05 1,01 0,93 0,93 0,93 0,9 0,75 0,75 0,71 0,6
Required Cards 4 10 20 50 100 200 400 1000 2000 0
The Screamer 1 2 3 4 5 6 7
Cost Improvement 440 000 560 000 700 000 860 000 1 040 000 1 240 000
Power 4 5 5 5 5 5 5
Aero 10 10 11 11 14 14 14
Grip 4 4 5 5 8 8 12
Reliability 3 4 4 5 5 8 8
Pit Stop 0,67 0,67 0,52 0,52 0,45 0,45 0,45
Required Cards 4 10 20 50 100 200 0
Sync Star 1 2 3 4 5 6 7 8
Cost Improvement 184 000 260 000 340 000 440 000 560 000 700 000 860 000
Power 4 4 4 4 4 4 5 5
Aero 6 8 8 8 9 10 12 12
Grip 7 10 10 12 12 14 14 14
Reliability 9 9 10 11 11 13 13 14
Pit Stop 1,01 0,97 0,82 0,82 0,67 0,67 0,63 0,45
Required Cards 4 10 20 50 100 200 400 0

Rear wing

Rear wing

Rear wing

Of all the rear fins Wind Tunnel is the best

Starter

Rear wing

1
Cost Improvement 0
Power 18
Aero 1
Grip 1
Reliability 3
Pit Stop 1,05
Required Cards 0
Sticky 1 2 3 4 5 6 7
Cost Improvement 2 000 6 800 16 000 32 000 54 000 86 000
Power 19 19 19 19 19 20 20
Aero 1 1 2 2 4 4 6
Grip 11 11 11 13 13 14 14
Reliability 3 4 4 4 5 6 6
Pit Stop 0,9 0,86 0,86 0,71 0,63 0,63 0,56
Required Cards 4 10 20 50 100 200 0
Jet Stream 1 2 3 4 5 6 7 8 9 10
Cost Improvement 6 800 16 000 32 000 54 000 86 000 128 000 184 000 260 000 340 000
Power 18 18 18 18 18 18 19 19 19 19
Aero 3 3 5 6 7 7 8 8 10 10
Grip 1 1 1 1 1 2 2 4 4 4
Reliability 3 3 4 4 4 5 5 7 7 9
Pit Stop 1,15 1,05 1,05 0,93 0,93 0,93 0,82 0,82 0,75 0,56
Required Cards 4 10 20 50 100 200 400 1000 2000 0
The Afterburner 1 2 3 4 5 6 7 8
Cost Improvement 32 000 54 000 86 000 128 000 184 000 260 000 340 000
Power 19 19 20 20 20 20 20 20
Aero 3 3 4 4 4 4 6 8
Grip 4 6 6 7 10 10 11 11
Reliability 3 3 4 4 5 6 6 7
Pit Stop 1,15 1,15 1,15 1,02 0,96 0,96 0,96 0,93
Required Cards 4 10 20 50 100 200 400 0
Air Force 1 1 2 3 4 5 6 7
Cost Improvement 86 000 128 000 184 000 260 000 340 000 440 000
Power 19 19 19 19 19 19 19
Aero 9 9 12 14 14 14 14
Grip 6 6 8 8 11 11 11
Reliability 3 4 4 7 7 9 10
Pit Stop 1,01 0,82 0,82 0,75 0,56 0,48 0,48
Required Cards 4 10 20 50 100 200 0
Dream Stream 1 2 3 4 5 6 7 8
Cost Improvement 184 000 260 000 340 000 440 000 560 000 700 000 860 000
Power 18 18 18 19 19 19 19 20
Aero 7 7 9 9 11 11 13 13
Grip 0 2 2 3 3 3 3 4
Reliability 11 12 12 12 12 14 14 14
Pit Stop 1,15 0,93 0,9 0,87 0,87 0,82 0,6 0,6
Required Cards 4 10 20 50 100 200 400 0
Wind Tunnel 1 2 3 4 5 6 7 8 9 10
Cost Improvement 440 000 560 000 700 000 860 000 1, 04 M 1, 24 M 1, 46 M 1, 72 M 2 M
Power 18 18 18 18 18 18 18 18 19 19
Aero 14 14 14 14 14 14 14 14 14 14
Grip 1 2 3 5 5 6 6 6 7 10
Reliability 3 3 3 4 4 6 7 9 10 10
Pit Stop 0,63 0,6 0,6 0,52 0,52 0,52 0,33 0,33 0,33 0,33
Required Cards 4 10 20 50 100 200 400 1000 2000 0
The Heavyweight 1 2 3 4 5 6 7
Cost Improvement 184 000 260 000 340 000 440 000 560 000 700 000
Power 19 20 20 20 20 20 20
Aero 4 7 7 7 9 9 11
Grip 7 7 7 9 10 12 13
Reliability 7 7 8 8 8 11 11
Pit Stop 0,97 0,97 0,93 0,9 0,67 0,6 0,41
Required Cards 4 10 20 50 100 200 0

Front wing

Front wing

Front wing

Regarding the front wing, getting started with The Turbulence is a good thing

Subsequently, The Rollercoaster and Laser Lock are excellent pieces

Starter

Front wing

1
Cost Improvement 0
Power 13
Aero 1
Grip 1
Reliability 3
Pit Stop 1,05
Required Cards 0
Ramjet 1 2 3 4 5 6 7
Cost Improvement 2 000 6 800 16 000 32 000 54 000 86 000
Power 13 13 13 13 13 13 13
Aero 4 4 6 9 9 9 12
Grip 1 2 2 2 2 2 4
Reliability 6 6 8 10 12 14 14
Pit Stop 1,05 0,97 0,9 0,9 0,87 0,75 0,75
Required Cards 4 10 20 50 100 200 0
The Turbulence 1 2 3 4 5 6 7 8 9 10
Cost Improvement 6 800 16 000 32 000 54 000 86 000 128 000 184 000 260 000 340 000
Power 13 13 13 13 13 13 13 14 14 14
Aero 4 6 6 7 9 9 11 11 12 13
Grip 1 1 1 1 3 3 6 6 6 6
Reliability 3 4 4 5 5 7 7 8 10 10
Pit Stop 1,15 1,15 1,05 0,93 0,93 0,9 0,9 0,75 0,75 0,67
Required Cards 4 10 20 50 100 200 400 1000 2000 0
Laser Lock 1 2 3 4 5 6 7 8
Cost Improvement 32 000 54 000 86 000 128 000 184 000 260 000 340 000
Power 14 15 15 15 15 15 15 15
Aero 0 0 2 4 4 5 7 7
Grip 9 12 13 13 13 14 14 14
Reliability 4 4 4 4 7 7 9 9
Pit Stop 1,01 1,01 0,96 0,93 0,93 0,71 0,71 0,56
Required Cards 4 10 20 50 100 200 400 0
The Rollercoaster 1 2 3 4 5 6 7 8 9 10
Cost Improvement 86 000 128 000 184 000 260 000 340 000 440 000 560 000 700 000 860 000
Power 13 13 13 13 13 13 13 13 14 14
Aero 3 3 5 5 5 7 7 7 8 8
Grip 3 3 4 4 5 5 7 9 9 9
Reliability 4 5 5 6 9 10 10 12 12 13
Pit Stop 1,15 1,01 1,01 0,99 0,93 0,9 0,75 0,75 0,63 0,56
Required Cards 4 10 20 50 100 200 400 1000 2000 0
The Racing Line 1 2 3 4 5 6 7
Cost Improvement 184 000 260 000 340 000 440 000 560 000 700 000
Power 14 14 15 15 15 15 15
Aero 9 10 11 11 14 14 14
Grip 1 1 2 5 5 8 8
Reliability 4 4 4 4 5 6 8
Pit Stop 0,75 0,67 0,67 0,6 0,6 0,6 0,33
Required Cards 4 10 20 50 100 200 0
The Limpit 1 2 3 4 5 6 7 8
Cost Improvement 440 000 560 000 700 000 860 000 1, 04 M 1, 24 M 1, 46 M
Power 14 14 14 14 14 14 14 14
Aero 10 10 10 10 13 13 13 13
Grip 1 3 3 3 3 3 3 3
Reliability 3 3 5 5 5 5 5 8
Pit Stop 0,9 0,9 0,9 0,9 0,9 0,9 0,67 0,67
Required Cards 4 10 20 50 100 200 400 0
Flicky 1 2 3 4 5 6 7
Cost Improvement 184 000 260 000 340 000 440 000 560 000 700 000
Power 14 14 15 15 15 15 15
Aero 3 3 4 6 9 9 12
Grip 14 14 14 14 14 14 14
Reliability 10 12 12 12 14 14 14
Pit Stop 1,15 1,15 1,05 1,01 1,01 0,99 0,86
Required Cards 4 10 20 50 100 200 0

Suspension

Suspension

Suspension

As for the suspension, the choice is quite simple : The Profiler

The Smoothie makes a good start and Recoil can be used in certain situations

Starter Suspension
1
Cost Improvement 0
Power 4
Aero 1
Grip 1
Reliability 3
Pit Stop 1,05
Required Cards 0
The Magic Carpet 1 2 3 4 5 6 7
Cost Improvement 2 000 6 800 16 000 32 000 54 000 86 000
Power 9 9 11 11 11 11 12
Aero 1 3 3 4 4 4 7
Grip 2 3 3 6 6 7 7
Reliability 5 5 5 7 7 7 10
Pit Stop 1,15 1,02 0,96 0,96 0,9 0,86 0,86
Required Cards 4 10 20 50 100 200 0
The Smoothie 1 2 3 4 5 6 7 8 9 10
Cost Improvement 6 800 16 000 32 000 54 000 86 000 128 000 184 000 260 000 340 000
Power 7 8 8 9 9 9 9 10 10 11
Aero 0 0 3 3 5 5 6 6 8 8
Grip 7 9 9 11 11 12 12 12 14 14
Reliability 3 3 4 4 5 6 7 7 7 7
Pit Stop 1,15 1,15 1,15 1,15 1,15 1,15 1,05 1,05 1,01 0,99
Required Cards 4 10 20 50 100 200 400 1000 2000 0
The Stilts 1 2 3 4 5 6 7 8
Cost Improvement 32 000 54 000 86 000 128 000 184 000 260 000 340 000
Power 9 9 10 10 11 11 12 12
Aero 9 12 12 13 13 14 14 14
Grip 1 2 2 2 4 4 4 4
Reliability 3 3 4 4 5 6 7 7
Pit Stop 0,93 0,86 0,86 0,71 0,71 0,52 0,52 0,33
Required Cards 4 10 20 50 100 200 400 0
SHOX 1 2 3 4 5 6 7
Cost Improvement 86 000 128 000 184 000 260 000 340 000 440 000
Power 11 11 12 12 13 13 13
Aero 2 2 2 4 4 8 8
Grip 4 6 6 6 9 9 9
Reliability 6 6 6 9 9 11 11
Pit Stop 0,96 0,93 0,9 0,86 0,78 0,71 0,45
Required Cards 4 10 20 50 100 200 0
The Profiler 1 2 3 4 5 6 7 8 9 10
Cost Improvement 184 000 260 000 340 000 440 000 560 000 700 000 860 000 1, 04 M 1, 24 M
Power 8 8 8 8 9 10 10 11 11 11
Aero 10 10 13 13 14 14 14 14 14 14
Grip 3 5 6 7 7 7 9 9 11 12
Reliability 3 3 3 3 3 4 6 7 9 9
Pit Stop 1,15 1,15 1,15 1,01 1,01 0,99 0,9 0,9 0,93 0,75
Required Cards 4 10 20 50 100 200 400 1000 2000 0
Spirit Level 1 2 3 4 5 6 7 8
Cost Improvement 440 000 560 000 700 000 860 000 1, 04 M 1, 24 M 1, 46 M
Power 9 9 9 10 10 10 11 11
Aero 1 1 1 2 5 7 7 10
Grip 1 2 4 4 5 6 6 9
Reliability 14 14 14 14 14 14 14 14
Pit Stop 1,01 0,97 0,75 0,75 0,6 0,6 0,37 0,35
Required Cards 4 10 20 50 100 200 400 0
Recoil 1 2 3 4 5 6 7
Cost Improvement 184 000 260 000 340 000 440 000 560 000 700 000
Power 13 13 13 13 13 13 13
Aero 7 7 9 9 13 14 14
Grip 10 10 13 13 13 13 14
Reliability 3 3 3 4 4 6 8
Pit Stop 0,96 0,93 0,86 0,78 0,63 0,63 0,37
Required Cards 4 10 20 50 100 200 0

Engine

Engine

Engine

For the engine the choice is on Zen and Free Wheeler

The Block is interesting but takes a long time to improve


Starter Moteur
1
Cost Improvement 0
Power 21
Aero 1
Grip 1
Reliability 3
Pit Stop 1,05
Required Cards 0
The Inferno 1 2 3 4 5 6 7 8 9 10
Cost Improvement 2 000 6 800 16 000 32 000 54 000 86 000 128 000 184 000 260 000
Power 21 21 21 22 22 22 23 23 23 23
Aero 3 4 4 4 6 6 8 8 9 10
Grip 1 1 1 1 3 3 3 3 5 5
Reliability 3 3 3 4 4 7 7 7 10 14
Pit Stop 1,05 1,05 0,93 0,93 0,86 0,86 0,67 0,45 0,45 0,45
Required Cards 4 10 20 50 100 200 400 1000 2000 0
Zen 1 2 3 4 5 6 7 8
Cost Improvement 6 800 16 000 32 000 54 000 86 000 128 000 184 000
Power 24 24 25 25 25 26 26 26
Aero 7 10 10 11 11 12 12 12
Grip 3 4 4 6 7 7 7 10
Reliability 3 3 4 4 4 7 7 7
Pit Stop 1,15 1,05 0,97 0,96 0,97 0,97 0,9 0,67
Required Cards 4 10 20 50 100 200 400 0
Tractor Beam 1 2 3 4 5 6 7
Cost Improvement 32 000 54 000 86 000 128 000 184 000 260 000
Power 23 23 23 24 24 24 25
Aero 1 1 2 2 3 6 6
Grip 14 14 14 14 14 14 14
Reliability 3 3 3 3 6 6 8
Pit Stop 1,15 1,01 1,01 0,99 0,99 0,99 0,67
Required Cards 4 10 20 50 100 200 0
Free Wheeler 1 2 3 4 5 6 7 8 9 10
Cost Improvement 86 000 128 000 184 000 260 000 340 000 440 000 560 000 700 000 860 000
Power 22 22 23 23 23 23 24 24 24 24
Aero 10 11 11 11 14 14 14 14 14 14
Grip 1 2 2 3 3 4 4 6 6 8
Reliability 3 3 4 4 4 5 6 6 10 10
Pit Stop 1,05 1,01 1,01 0,86 0,86 0,6 0,6 0,52 0,52 0,33
Required Cards 4 10 20 50 100 200 400 1000 2000 0
The X-1 1 2 3 4 5 6 7 8
Cost Improvement 184 000 260 000 340 000 440 000 560 000 700 000 860 000
Power 23 23 23 24 24 25 25 25
Aero 9 9 12 12 13 13 14 14
Grip 1 1 1 1 3 4 6 7
Reliability 3 3 3 4 4 8 8 8
Pit Stop 0,75 0,48 0,48 0,37 0,37 0,37 0,37 0,37
Required Cards 4 10 20 50 100 200 400 0
The Block 1 2 3 4 5 6 7
Cost Improvement 440 000 560 000 700 000 860 000 1, 04 M 1, 24 M
Power 24 24 25 25 26 26 26
Aero 7 9 9 9 9 9 13
Grip 6 6 8 8 10 12 14
Reliability 6 6 11 11 11 14 14
Pit Stop 1,01 1,01 1,01 0,9 0,6 0,48 0,37
Required Cards 4 10 20 50 100 200 0
Warp Drive 1 2 3 4 5 6 7
Cost Improvement 184 000 260 000 340 000 440 000 560 000 700 000
Power 25 26 26 26 27 27 27
Aero 5 5 6 9 11 11 12
Grip 5 8 9 9 9 11 13
Reliability 3 3 3 3 6 11 11
Pit Stop 1,05 0,9 0,9 0,9 0,9 0,9 0,56
Required Cards 4 10 20 50 100 200 0

The Pilots

The pilots

The pilots

The choice of your drivers will certainly evolve or change depending on the improvement cards you receive

But you will quickly see that some drivers are essential and that others will not necessarily be necessary

Be sure to read our full game guide and tips for getting the most out of your pilots

Lance Stroll 1 2 3 4 5 6 7 8 9 10
Cost Improvement 2 000 6 800 16 000 32 000 54 000 86 000 128 000 184 000 260 000
Overtaking 10 20 20 36 36 46 46 51 67 67
Defense 15 15 30 30 35 35 41 41 41 57
Regularity 10 10 10 10 21 21 39 39 39 39
Fuel

Economy

20 20 30 30 30 35 35 51 51 62
Tire Management 20 20 35 40 51 51 56 56 67 72
Rain Performance 39 39 40 40 40 40 40 41 42 42
Required Cards 4 10 20 50 100 200 400 1000 2000 0
Alexander Albon 1 2 3 4 5 6 7 8 9 10
Cost Improvement 2 000 6 800 16 000 32 000 54 000 86 000 128 000 184 000 260 000
Overtaking 12 12 26 26 30 30 44 54 54 54
Defense 9 9 9 9 18 18 18 23 37 37
Regularity 25 35 35 38 38 42 42 42 42 45
Fuel

Economy

9 9 9 26 26 52 52 52 70 70
Tire Management 38 38 38 40 40 40 41 41 41 42
Rain Performance 15 30 30 35 35 51 51 56 67 67
Required Cards 4 10 20 50 100 200 400 1000 2000 0
Nico Hulkenberg 1 2 3 4 5 6 7
Cost Improvement 2 000 6 800 16 000 32 000 54 000 86 000
Overtaking 40 40 58 64 64 64 85
Defense 60 66 66 72 91 91 98
Regularity 12 12 12 24 50 50 82
Fuel

Economy

0 12 12 12 12 12 28
Tire Management 40 40 58 70 83 100 100
Rain Performance 20 29 29 61 61 83 83
Required Cards 4 10 20 50 100 200 0
Antonio Giovinazzi 1 2 3 4 5 6 7 8 9 10
Cost Improvement 6 800 16 000 32 000 54 000 86 000 128 000 184 000 260 000 340 000
Overtaking 10 31 31 38 38 46 46 38 83 90
Defense 45 45 48 48 48 48 48 48 48 48
Regularity 5 10 10 10 10 21 21 36 36 42
Fuel

Economy

20 24 24 24 36 45 53 53 66 66
Tire Management 50 56 56 72 72 78 84 84 100 100
Rain Performance 10 10 23 23 23 43 43 57 57 71
Cartes requises 4 10 20 50 100 200 400 1000 2000 0
Robert Kubica 1 2 3 4 5 6 7 8
Cost Improvement 6 800 16 000 32 000 54 000 86 000 128 000 184 000
Overtaking 84 84 85 89 89 90 90 90
Defense 28 43 43 43 51 51 66 66
Regularity 4 4 17 17 27 27 32 32
Fuel

Economy

5 5 10 10 25 25 36 36
Tire Management 25 25 25 41 41 57 57 84
Rain Performance 20 20 31 31 48 48 48 67
Required Cards 4 10 20 50 100 200 400 0
Max Verstappen 1 2 3 4 5 6 7
Cost Improvement 6 800 16 000 32 000 54 000 86 000 128 000
Overtaking 17 40 57 57 75 100 100
Defense 35 35 37 37 37 38 38
Regularity 30 30 39 39 44 44 61
Fuel

Economy

72 72 72 81 100 100 100
Tire Management 10 15 15 15 27 45 51
Rain Performance 60 66 66 72 91 91 98
Required Cards 4 10 20 50 100 200 0
Daniil Kvyat 1 2 3 4 5 6 7 8 9 10
Cost Improvement 32 000 54 000 86 000 128 000 184 000 260 000 340 000 440 000 560 000
Overtaking 35 35 40 53 58 58 67 67 67 67
Defense 50 60 60 60 65 65 65 65 65 81
Regularity 36 38 38 39 39 39 40 42 42 42
Fuel

Economy

25 25 25 32 32 39 39 39 62 62
Tire Management 40 49 54 54 68 68 77 77 87 87
Rain Performance 26 26 26 43 43 70 70 79 79 88
Required Cards 4 10 20 50 100 200 400 1000 2000 0
Pierre Gasly 1 2 3 4 5 6 7 8
Cost Improvement 32 000 54 000 86 000 128 000 184 000 260 000 340 000
Overtaking 55 55 56 57 57 59 59 59
Defense 15 15 15 25 25 30 47 47
Regularity 12 17 17 17 66 66 74 74
Fuel

Economy

20 30 30 45 50 50 50 67
Tire Management 42 42 59 59 65 65 71 90
Rain Performance 14 14 28 28 28 48 48 63
Required Cards 4 10 20 50 100 200 400 0
Daniel Ricciardo 1 2 3 4 5 6 7
Cost Improvement 32 000 54 000 86 000 128 000 184 000 260 000
Overtaking 79 79 98 98 100 100 100
Defense 78 82 82 84 84 88 90
Regularity 30 30 42 60 60 60 81
Fuel

Economy

20 20 20 54 54 74 74
Tire Management 33 38 54 65 65 83 83
Rain Performance 64 83 83 83 100 100 100
Required Cards 4 10 20 50 100 200 0
Lando Norris 1 2 3 4 5 6 7 8 9 10
Cost Improvement 86 000 128 000 184 000 260 000 340 000 440 000 560 000 700 000 860 000
Overtaking 2 2 2 4 4 4 26 41 41 63
Defense 15 19 31 31 40 40 44 44 56 65
Regularity 46 46 47 47 50 52 52 56 56 57
Fuel

Economy

45 45 54 68 68 73 73 77 87 87
Tire Management 70 84 84 84 90 90 90 90 90 90
Rain Performance 15 19 19 31 31 40 40 48 48 61
Required Cards 4 10 20 50 100 200 400 1000 2000 0
Carlos Sainz 1 2 3 4 5 6 7 8
Cost Improvement 86 000 128 000 184 000 260 000 340 000 440 000 560 000
Overtaking 50 66 66 77 77 95 100 100
Defense 37 42 42 59 65 65 71 90
Regularity 25 31 31 31 48 48 48 48
Fuel

Economy

60 81 81 88 88 96 96 96
Tire Management 6 6 12 12 18 31 52 52
Rain Performance 10 10 18 41 41 41 50 76
Required Cards 4 10 20 50 100 200 400 0
Valtteri Bottas 1 2 3 4 5 6 7
Cost Improvement 86 000 128 000 184 000 260 000 340 000 440 000
Overtaking 37 37 37 43 56 56 56
Defense 16 27 27 33 39 45 63
Regularity 65 65 83 95 95 95 100
Fuel

Economy

76 76 92 92 92 98 98
Tire Management 65 65 83 95 95 95 100
Rain Performance 15 30 30 41 41 41 41
Required Cards 4 10 20 50 100 200 0
George Russell 1 2 3 4 5 6 7 8 9 10
Cost Improvement 184 000 260 000 340 000 440 000 560 000 700 000 860 000 1, 04 M 1, 24 M
Overtaking 54 54 54 54 55 55 56 56 57 58
Defense 25 29 41 41 50 50 54 54 66 75
Regularity 20 20 35 35 43 48 48 52 62 62
Fuel

Economy

7 7 7 14 14 14 36 51 51 73
Tire Management 33 33 42 55 55 65 65 65 75 75
Rain Performance 76 76 77 77 80 82 82 86 86 87
Required Cards 4 10 20 50 100 200 400 1000 2000 0
Charles Leclerc 1 2 3 4 5 6 7 8
Cost Improvement 184 000 260 000 340 000 440 000 560 000 700 000 860 000
Overtaking 20 20 31 31 48 48 48 67
Defense 20 20 20 36 36 44 70 70
Regularity 80 80 85 85 90 90 90 90
Fuel

Economy

10 15 15 39 55 63 89 100
Tire Management 10 10 15 15 20 36 47 64
Rain Performance 41 43 44 44 44 44 44 44
Required Cards 4 10 20 50 100 200 400 0
Kimi Raikkonen 1 2 3 4 5 6 7
Cost Improvement 184 000 260 000 340 000 440 000 560 000 700 000
Overtaking 65 65 71 71 77 77 84
Defense 64 64 64 82 82 100 100
Regularity 74 74 90 90 95 95 95
Fuel

Economy

30 30 38 38 56 56 85
Tire Management 20 25 25 36 36 54 54
Rain Performance 17 45 45 56 56 79 100
Required Cards 4 10 20 50 100 200 0
Romain Grosjean 1 2 3 4 5 6 7 8 9 10
Cost Improvement 440 000 560 000 700 000 860 000 1, 04 M 1, 24 M 1, 46 M 1, 72 M 2 M
Overtaking 13 23 38 43 49 64 64 75 75 85
Defense 15 19 31 37 40 40 44 44 56 65
Regularity 4 4 6 10 13 13 26 41 41 63
Fuel

Economy

66 66 67 67 70 72 72 76 76 77
Tire Management 70 84 84 84 90 90 90 90 90 90
Rain Performance 70 84 84 84 90 90 90 90 90 90
Required Cards 4 10 20 50 100 200 400 1000 2000 0
Sergio Perez 1 2 3 4 5 6 7 8
Cost Improvement 2 000 440 000 560 000 700 000 860 000 1 040 000 1, 24 M 1, 46 M
Overtaking 40 40 40 57 57 57 57 57
Defense 3 3 3 9 32 47 47 64
Regularity 75 75 75 86 86 86 93 93
Fuel

Economy

7 11 22 22 28 34 40 58
Tire Management 95 95 95 95 95 95 95 95
Rain Performance 42 57 57 73 73 95 95 95
Required Cards 4 10 20 50 100 200 400 0
Sebastian Vettel 1 2 3 4 5 6 7
Cost Improvement 440 000 560 000 700 000 860 000 1, 04 M 1, 24 M
Overtaking 61 66 68 68 68 68 68
Defense 75 86 86 92 100 100 100
Regularity 35 35 44 58 60 69 87
Fuel

Economy

60 60 79 79 86 100 100
Tire Management 64 64 64 80 80 80 100
Rain Performance 39 41 41 43 43 44 44
Required Cards 4 10 20 50 100 200 0
Kevin Magnussen 1 2 3 4 5 6 7 8
Cost Improvement 184 000 260 000 340 000 440 000 560 000 700 000 860 000
Overtaking 38 43 53 53 68 68 79 79
Defense 78 78 91 91 91 96 96 96
Regularity 20 20 20 30 30 30 36 52
Fuel

Economy

79 83 84 84 86 86 88 88
Tire Management 20 35 35 35 43 68 68 68
Rain Performance 30 30 30 38 62 79 79 88
Required Cards 4 10 20 50 100 200 400 0
Lewis Hamilton 1 2 3 4 5 6 7
Cost Improvement 184 000 260 000 340 000 440 000 560 000 700 000
Overtaking 81 82 82 85 85 88 88
Defense 45 45 54 59 59 75 75
Regularity 45 45 53 53 80 80 90
Fuel

Economy

45 60 60 60 72 78 78
Tire Management 45 45 70 70 79 79 98
Rain Performance 100 100 100 100 100 100 100
Required Cards 4 10 20 50 100 200 0

Be sure to read our full game guide and tips for getting the most out of your pilots

Feel free to share your F1 Clash tips and strategies in comments

You can also share your videos related to F1 Clash

Rival Stars Horse Racing : Complete guide – Breeding and racing tips

Rival Stars Horse Racing guide

Rival Stars Horse Racing guide


Rival Stars Horse Racing is a realistic horse racing game that will give you the experience of being a jockey and running your own stud farm


Breed and breed your horses to obtain a line of champions. Take part in races and events with your own horses


A complete experience with beautiful graphics


Good to know


  •  Consider collecting your property income
  •  Check the shop regularly, the rotation of objects and horses is very fast
  •  Take part in events, they are regular and require little time
  •  Train your horses at level 5, it does not require waiting time and increases their values
  •  Cross your horses to increase their ranks
  •  You will win more easily with a good racing strategy
  •  The lower your grades, the higher your chances of winning
  •  Getting a good start is very important
  •  Do not leave your horse on its own, control its course during the race
  •  Your running position will make all the difference
  •  Use your sprint correctly to take the first place
  •  Increase your boxes and improve your horses to unlock new races
  •  Develop your stable to breed horses of better ranks
  •  Avoid inbreeding in your crosses
  •  Raising your first foal will take a little while but don’t worry the birth of a baby boy will come


First steps


First steps

First steps


At the start of the game, follow the objectives given by the game while keeping your gold for the crossings and increase your boxes

Once your first experiences of the game are done, you are ready to embark on the great adventure of racing and breeding


Races


Races

Races


How to choose your horse


Choose your horse

Choose your horse


When you choose a race, different statistics are displayed to you

The odds score defines your chance of winning

The lower the score, the more likely you are to win


It will be defined by your horse’s performance and preferences


Performances :

Speed, sprint energy, acceleration

Preferences :

Distance : from 800m to 3200m

Runway surface : very soft, soft, medium, firm, hard, very hard

Position : front, middle, rear


Adapting your playing style to the highest-rated horse will be more effective than taking your favorite horse and letting it adapt to racing conditions


The secrets to winning a race


The secrets of a race

The secrets of a race


To win a race the start is very important.

When leaving, press at the right time to get an acceleration boost.

This will allow you to get a good place from the start of the race.


The start

The start


Then focus on your positioning, blue areas will show you where to place yourself. Sprint as needed to place yourself in the right place

As soon as the correct position is taken, your sprint gauge will reload faster


The spint gauge

The sprint gauge


Steer your horse to take the best possible trajectories (inside corners)


Cornering

Cornering


When your sprint gauge is full, take the opportunity to sprint a little while keeping the right position

Increase your gauge to the maximum for the last straight line, the last 200 meters


The last 200 meters

The last 200 meters


As soon as the last 200 meters begin, sprint to the end!

If your position is good, you will have enough sprint to the end because the reload will be faster


The finish line

The finish line


Breeding

Breeding

Start in breeding


Start in breeding


Start in breeding

Start in breeding


One of the most interesting aspects of this game is raising your own horses

In the stable you can create your own champions


Breed horses

Breed horses


Your starting gold and the gold earned from the objectives will allow you to breed horses with a better rank quickly and to buy the first boxes required

Choose to cross your starting mare with higher level stallions

Your chance of getting a higher rank will greatly increase


Stallion crossing 4

Stallion crossing 4


Choices 4 and 5 in gold will allow you to quickly improve the rank of your filly (or foal if you are lucky)


Stallion crossing 1

Stallion crossing 1


If you have no more gold, you can use choices 1 and 2 or buy a foal at the market with coins or roses won during events

It will be longer to build class and more expensive in objects


Personal stallion crossing

Personal stallion crossing


Breeding his first foal


Breeding his first foal

Breeding his first foal


To breed your first foal, you will need to be patient

A few crosses will be necessary to get there, unless you are ultra-lucky

Your first foal will arrive around level 5 in your story

(May be different depending on your luck and your crossing rate)


Have his stallion

Have his stallion


Example of a first stallion with the number of crosses made to obtain it as well as its complete pedigree without consanguinity


Complete pedigree without consanguinity

Complete pedigree without consanguinity


View large picture


You now have all the keys in hand to raise high-ranking champions and know all the tricks to win your races


Feel free to share your Rival Stars Horse Racing tips and strategies in comments

You can also share your videos related to Rival Stars Horse Racing

F1 Clash : Complete Guide – Tips and Tricks – All Series

F1 Manager guide

F1 Manager guide

This complete guide on F1 Clash is intended to help you reach Series 7 quickly

You will find tips and tricks for each series in the game

Find out how to quickly unlock all drivers and auto parts

You can view our full list of parts and driver stats

Good to know

  • The free boxes pay according to the unlocked series, the higher you are more you will win
  • A free box every four hours and you can store two
  • Remember to take the coins and the free boxes
  • The boxes also evolves according to your series
  • The race’s boxes are endless ! Score as many points as possible to earn gold and cards
  • These boxes will help you well at the start of the game because gold is necessary to play and improve your team
  • Driving on green saves a lot of gas and tire !
  • It is difficult to overtake in the first half of the race
  • Soft and hard tires withstand rain up to 30% humidity
  • If you can’t win 3 out of 5 games, go down to the previous series
  • Generally soft tires are better than hard tires
  • You can ignore, in most cases, the recommendations of your drivers

Serie 1

Pilots serie 1

Pilotes serie 1

At the start of the game, you don’t have the choice to use your two original pilots and your starter parts

Your goal will be to target drivers who have a good management to them fuel and tires. For example Norris, Perez, Grosjean or at least Kvyat

Bottas and Giovinazzi are to be saved for later because Bottas is an epic card and Giovinazzi obtains 100% tire management only at level 9

Generally soft tires are better than hard tires

It’s important to ride on the green the first laps to save your fuel (and tires) and continue driving on the red with your two drivers on the last 2 laps (or the last 3 depending of your fuel)

Avoid stacking ! (stacking is the fact of having your 2 pilots blocked at the same time at the pit)

Even if your pilots get stuck from time to time in the pit it doesn’t matter

Try to space your drivers by boosting the first one on the red >>> and leave your second driver on the green to change tires

To minimize the risk of stacking, you can alternate the stops between your pilots

For example: stops on turn 3-3-2 with Albon and stops 2-3-3 with Stroll

Serie 2

Pilots serie 2

Pilots serie 2

Equip Kvyat as soon as you unlock it because it is faster on the last laps

Avoid series 3 because the strategy is different

Get all the flags from series 2 and go to series 4

As for your formula 1, essentially increase aerodynamics and speed

Serie 3

Pilots serie 3

Pilots serie 3

Before starting this series, it is better to have improved your car and reduced the pit stop time to limit the risk of stack

Use your pilots with the best stats in the rain

Upgrade the Norris, Perez, Grosjean drivers and continue to upgrade your auto parts

Car serie 3

Car serie 3

Recommended parts

Brakes: Soft Touch / The Chute

Gearbox: The Shredder / Sync Star

Rear spoiler: Wind Tunnel

Front spoiler: The Turbulence / Laser Lock / The Rollercoaster

Suspension: The Profiler

Motor: Zen / Free Wheeler

Serie 4

Pilots serie 4

Pilots serie 4

Recommended pilots: Perez and Norris – Grosjean

Series 4 is much more difficult because your cars cannot run 3 laps on softs due to the high temperature.

If you’re stuck, the best thing to do is to collect Race 2 race points and unlock Norris.

Once you have equipped Norris and Kvyat, you will only have to collect the flags of series 4 and move on to series 5.

Always the same strategy, roll the first laps on green in order to save money and roll on red the last 2 or 3 laps.Strategy for 3-3-2 on an 8-lap race (changing tires on the 3rd and 6th lap).

What is important is to be able to drive red after changing tires on the 6th lap.

If you have a lot of gas, make your 3rd round on red and start 6th round on red until the end.

When it comes to your car, focus on aerodynamics and speed.

The grip is useful but secondary on this series.

Car serie 4

Car serie 4

Recommended parts

Brakes: Soft Touch / The Chute

Gearbox: The Shredder / Sync Star

Rear spoiler: Wind Tunnel

Front spoiler: The Turbulence / Laser Lock / The Rollercoaster

Suspension: The Profiler

Motor: Zen / Free Wheeler

Serie 5

Pilots serie 5

Pilots serie 5

Recommended drivers: Grosjean and Norris

The first two pilots were chosen because of their great fuel management.

Use the usual strategy 3-3-2.

Roll on green the first laps and roll on red the last 3 laps.

You can also boost your 3rd round if you have enough gas.

Regarding your vehicle, favor aerodynamics.

Pilots serie 5

Pilots serie 5

Recommended parts

Brakes: The Chute

Gearbox: The Shredder / Sync Star

Rear spoiler: Wind Tunnel

Front spoiler: Laser Lock / The Rollercoaster

Suspension: The Profiler

Motor: Zen / Free Wheeler

Série 6

Pilots serie 6

Pilots serie 6

Recommended drivers: Grosjean and Perez – Norris

Alternative: Bottas level 4 and Perez

Because of the frequent rains on this series, it is interesting to favor strong pilots in wet weather.

Perez has very good rain capacity and better tire management than Norris. In addition, he is the best driver for the Suzuka circuit.

Shanghai and Melbourne follow the same strategy as series 5, unless you use Perez who can only run 2 laps at a faster pace.

The alternative is to use Bottas from level 4 and Perez. At level 4, Bottas benefits from a great regularity.

The regularity allows for better results in qualification and thus to start the race in better places.

Bottas and Perez will start the race in good places, this will compensate for the bottom results of Bottas in the rain.

When it comes to parts improvements, you still need to focus on aerodynamics but balancing the grip a little will also be important.

Car serie 6

Car serie 6

Recommended parts

Brakes: The Chute

Gearbox: Sync Star

Rear spoiler: Wind Tunnel

Front spoiler: Laser Lock / The Rollercoaster

Suspension: The Profiler

Motor: Zen / Free Wheeler

Série 7

Pilots serie 7

Pilots serie 7

Recommended drivers: Grosjean and Perez

Alternative: Bottas level 4 and Perez

Grosjean has a lower regularity. The starting positions of Perez and Grosjean will have a wide spread which will decrease the risk of stack.

Monaco: use the 5 -3 strategy.

The last 3 laps on red. If your tires and petrol allow you, also make the 5th lap on the red

Baku: use the 3-3-2 strategy.

Marina Bay: use strategy 4-3. The first 3 laps on green and the last 3 laps on red.

The choice of parts in series 7 is more about grip. You will need to balance your stats because grip is much more useful than before. Good speed, good grip and good aerodynamics.

Car serie 7

Car serie 7

Recommended parts

Brakes: The Chute

Gearbox: Sync Star

Rear spoiler: Wind Tunnel

Front spoiler: Laser Lock / The Rollercoaster

Suspension: The Profiler

Motor: Zen / Free Wheeler

Be sure to check out our full list of parts and driver stats to get the most out of your gold

Feel free to share your F1 Manager Mobile tips and strategies in comments

You can also share your videos related to F1 Manager Mobile